
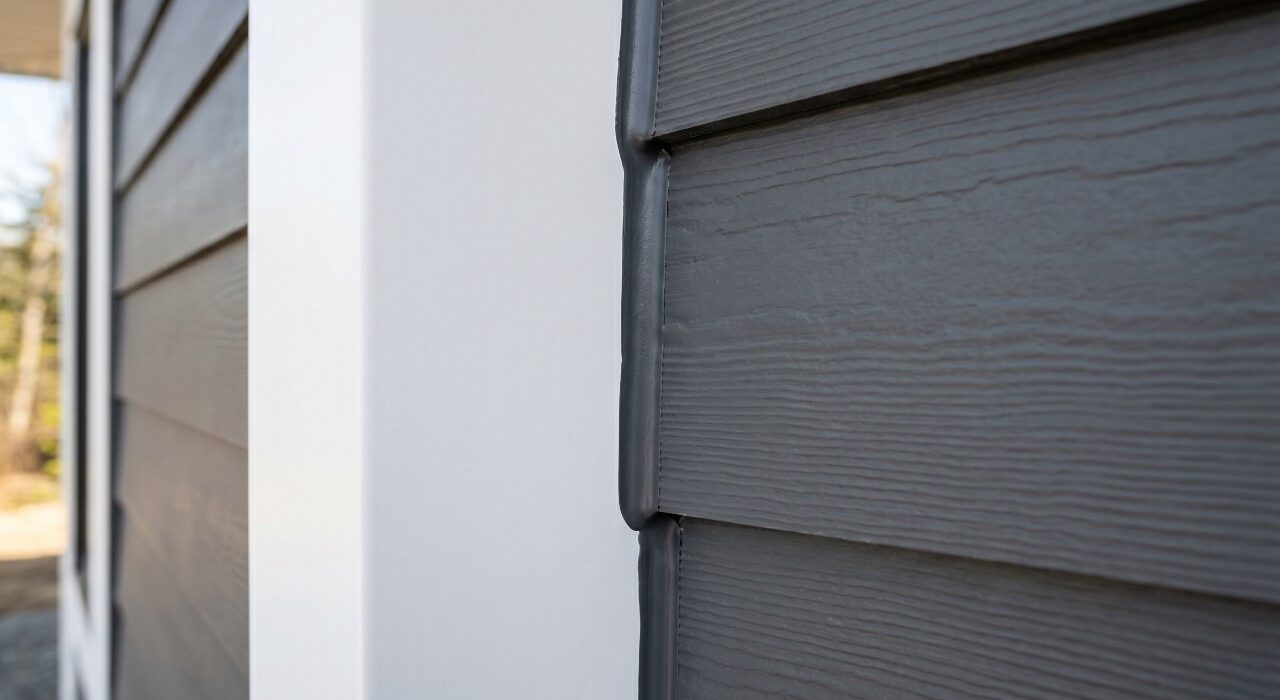
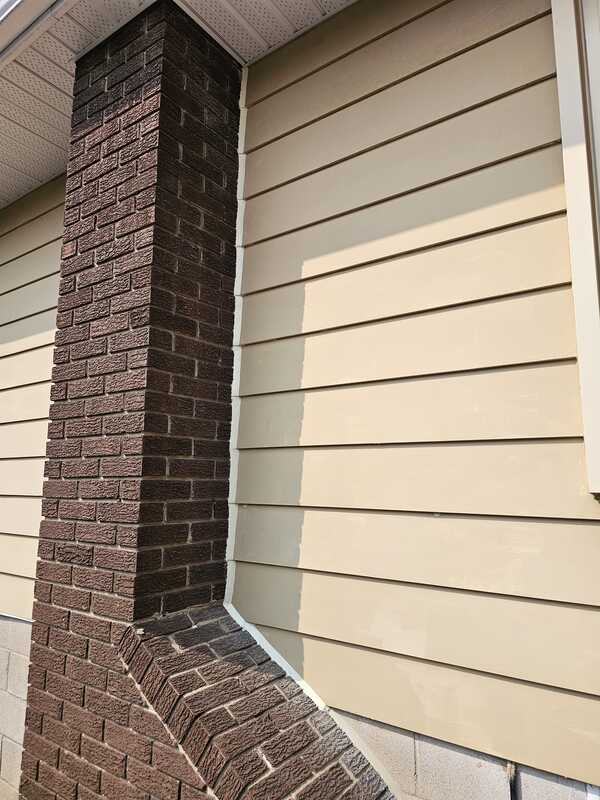
Walk along the side wall of your home in Oakville, Burlington, or Milton and look at the vertical lines where your siding panels meet the corner trim boards, window casings, and fascia edges.
Those seams are your outer drainage plane perimeter, and siding and trim caulking along every one of them is what keeps the wall cavity behind the cladding dry.
When those seams open, water does not announce itself with an immediate interior leak. It enters the drainage plane, bypasses the weather-resistant barrier below, and begins destroying the wall assembly from behind the cladding face.
By the time the damage is visible, it has typically been active for two or more seasons.
Cladding Physics: Thermal Shifting and Edge Moisture Wicking
Fibre cement siding, composite cladding boards, and vinyl trim panels all respond differently to intense heat, moisture, and UV exposure. Fibre cement operates as a dense, thermally massive material that heats up slowly but reaches high surface temperatures under sustained direct sun, expanding significantly along its length before cooling contracts it back.
Vinyl corner trim wraps and window casings expand and contract far more rapidly and at a completely different rate than the dense fibre cement boards butting against them. Solid wood trim wraps and fascia boards absorb and release environmental moisture dimensionally in structural ways that neither vinyl nor composite planks ever replicate.
These exterior materials remain in a state of constant, opposing dimensional motion against each other at every vertical butt joint, corner junction, and siding-to-window casing interface. Consumer-grade acrylic or retail latex caulks have low elongation ratings that cannot accommodate this extreme movement amplitude across a full Canadian seasonal cycle.
They rapidly fail by shearing right through the center of the bead or releasing adhesion along the porous, raw edge of the fibre cement board. This material failure leaves an open, unshielded channel that directs any driving rainwater reaching the joint face straight into your internal drainage cavities.
For local properties with synthetic stucco or EIFS wall systems facing similar perimeter joint failures, our article on stucco exterior caulking repair covers the specific trade constraints and elastomeric material chemistry required for sealant restoration on textured render faces. Following these specialized methodologies ensures your multi-material wall sections remain completely weather-tight over the long term.
For the strict regulatory design clearances and detailing requirements governing structural siding installations and multi-material trim interfaces, checking the official International Residential Code cladding clearances defines the mandatory engineering baseline for moisture management at exterior wall covering perimeters.
Meeting these updated building guidelines guarantees your overhead and vertical board runs stay fully protected against relentless storm forces.
The Sub-Shearing Nightmare: Buckling Boards and Rotted Barriers
When a vertical siding seam or trim butt joint opens, it creates a direct path straight through your outer drainage plane. Rainwater that reaches the joint face under wind-driven storm pressure enters the narrow cavity between the siding boards and the weather-resistant barrier below.
If the secondary building wrap is completely intact, the trapped water should theoretically drain down to the weep screed flashings at the base of the wall. In real-world properties, a failed siding joint usually coexists with an inadequately lapped weather barrier, allowing tracking water to saturate the plywood sheathing directly.
Plywood wall sheathing that is repeatedly wetted rapidly loses its structural panel adhesive layers through progressive delamination. The structural timber sheathing that your siding planks are nailed to softens over multiple seasons, losing its fastener holding capacity.
When the underlying sheathing loses its structural integrity, the heavy siding boards it anchors begin to work loose from the wall. They flex and warp under wind loading rather than staying rigid, accelerating both the cladding joint failure and the hidden sheathing degradation simultaneously.
The load-bearing framing members behind the sheathing are the next materials in this destructive moisture migration path. Deep wood rot in exterior wall studs and lower structural sill plates is a severe safety concern that goes far beyond cosmetic cladding board replacement.
It requires extensive, expensive framing carpentry remediation before any fresh siding or new exterior sheathing can legally be reinstalled on the house facade. If a complete exterior house repainting is planned following a siding restoration, this crucial weathersealing work must happen before any primer or topcoat is applied.
Our article on exterior caulking painting prep covers exactly why paint applied over failed or unrestored siding joints bubbles and peels within a single season regardless of paint quality. Coordinating these steps guarantees your home’s fresh coating bonds perfectly across every composite board transition.
Our Specialized 4-Phase Siding Restoration Workflow
Smearing new caulk over a failed siding joint produces a result that separates before the end of its first seasonal cycle. The porous edge of a fibre cement or composite board that has been exposed to weather accumulates surface oxidation, dust film, UV-degraded polymer residue from the previous sealant, and biological growth along the joint channel.
New sealant applied over this surface bonds to the contamination layer rather than to the actual board edge. It fails adhesively at that contamination interface under the very first significant thermal movement cycle.
Phase 1: Precision Mechanical Channel Scraping of Weather-Beaten Cladding Joints
All existing sealant is removed from every vertical siding butt joint, corner trim interface, and window casing perimeter using oscillating tools and specialized detail scrapers. The extraction setup must be carefully adapted to the unique board profile and specific joint width.
Fibre cement board edges are porous and mechanically fragile at the raw cut face. This extraction phase requires highly controlled tool angles and light stroke pressure to avoid gouging the board face or fracturing the edge along the paint line.
The mechanical extraction is only complete when bare board faces and bare trim faces are fully exposed at both sides of the joint channel. There must be zero residual adhesive or polymer film remaining along either substrate.
Phase 2: Stripping Environmental Oxidation, Dust Film, and Cellular Residue
After mechanical extraction, all joint faces are cleaned with specialized solvents to remove oxidation film from composite surfaces, atmospheric dust, and biological mold or lichen cellular material. Fibre cement board edges easily absorb airborne contaminants deep into their porous surface profiles.
Solvent cleaning successfully penetrates that surface to remove deep contamination at the adhesion depth rather than only clearing the outermost face. The substrate must be confirmed clean, dry, and free of any release agent or factory surface treatment before new sealant is applied.
Phase 3: Seating Compression-Fit Elongation Buffers Along Vertical Butt Channels
Deep siding butt joints between panel ends, and wider gaps at corner trim or window casing interfaces, require a backing foam rope at the correct depth. Controlling this joint depth establishes the precise two-point adhesion geometry that gives the sealant compound its elongation capability under multi-axis shear loading.
As detailed in our guide to professional joint preparation, creating a flexible hourglass cross-section prevents the sealant from tearing down the center. For vertical siding butt joints specifically, the compression fit must account for the joint’s tendency to widen as the panel ends shrink through moisture loss in dry summer conditions.
The rod diameter is selected to maintain positive backing contact across the full anticipated movement range rather than matching the current joint width at the time of installation. This deep joint engineering protects the bond lines from structural failure when the building shifts.
Phase 4: Tooling High-Movement, Non-Staining Architectural Silicone Barriers
The specified commercial-grade architectural sealant is applied along every prepared joint using professional equipment to ensure consistent bead volume. Non-staining neutral-cure silicone formulations are specified for fibre cement and composite siding applications specifically because retail acetoxy-cure silicones release harsh acetic acid during curing.
This acid permanently stains porous composite and cement board surfaces, leaving a discoloured halo along the joint line that cannot be removed without refinishing the adjacent board face. The finished bead is tooled to a smooth, slightly concave profile that sheds water away from the joint face and maintains the correct cross-sectional geometry.
Taking the time to execute this high-elongation installation creates a permanent, shock-absorbing barrier that easily survives the ongoing movement loads of modern siding systems.
5 Signs Your Siding and Trim Joints Need Immediate Attention
A careful walk along each elevation of your home’s exterior identifies every active cladding joint failure before the wall cavity consequences become structural [DOW]. Spotting these subtle visual triggers early lets you correct the tracking track before it targets your home’s plywood sheathing. Left unsealed, these expanding gaps also invite destructive wood-boring bugs to invade your structural framework.
To discover how exterior wall gaps function as immediate pest highways, read our article on pest prevention window caulking to learn how to insulate your property boundaries.
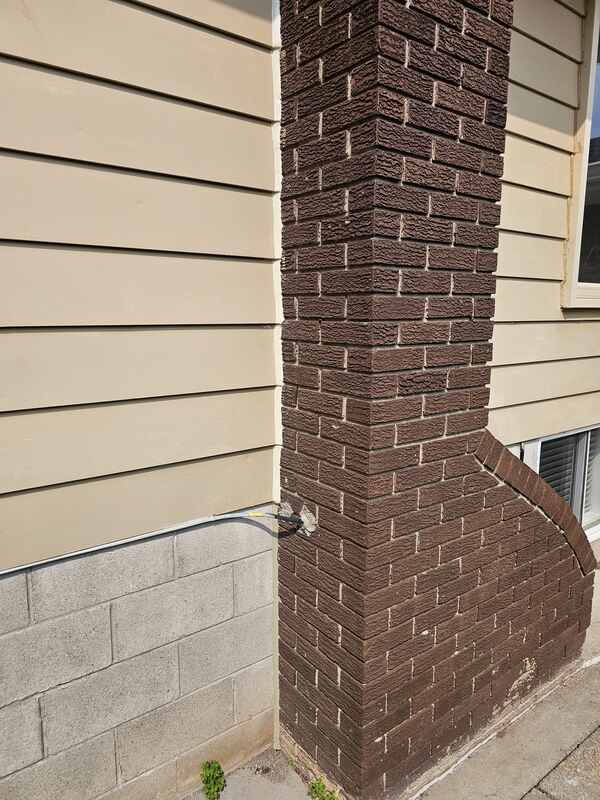
1. Visible Board-Edge Separation and Adhesive Delamination
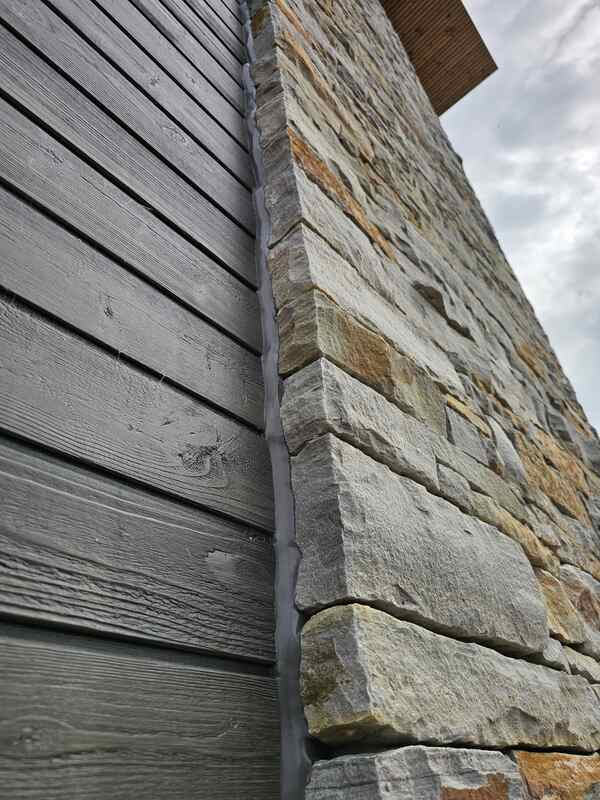
Sealant that has pulled away from the board edge or trim face on any side of a vertical joint is no longer providing drainage plane protection at that location. This narrow separation forms an open water track, allowing horizontal storm rain to siphon straight behind your siding panels during heavy rainstorms.
2. Flat or Convex Bead Profiles That Trap Running Water
A bead that is flat or convex rather than concave across its profile will direct water inward at the joint face rather than shedding it across the cladding surface. This improper geometry forces running water to pool directly along the porous edge of the siding instead of throwing it safely away from the wall.
3. Buckling, Bowing, or Warped Cladding Planks
Siding boards that are buckling, bowing, or pulling away from the wall face adjacent to a trim interface have lost their sheathing fastener holding capacity. This physical warping indicates that the plywood sheathing below has been absorbing tracking moisture through the joint for multiple seasons.
4. Localized Paint Peeling, Blistering, and Edge Bubbling
Paint that is peeling or bubbling at the board edges directly adjacent to a trim or butt joint is responding to moisture cycling through the joint below the paint film. This paint failure is a symptom of underlying water trapping, not paint quality or original roller application failure.
5. Original Builder Seals Exceeding 10 Years of Total Exposure
Any vertical siding joint or trim perimeter that has not been professionally inspected or replaced since the original construction is operating well beyond its expected service life. Even if the old compound appears smooth from a distance, its deep molecular adhesion against the porous composite edge has completely vanished.
Seal Your Cladding Perimeter Before the Wall Cavity Pays the Price
An open siding butt joint or failed trim perimeter allows water to bypass the outer drainage plane with every wind-driven rain event. The plywood sheathing, weather-resistant barrier, and structural framing behind your home’s exterior cladding are not rated for direct moisture exposure.
The cost of resealing a vertical board joint is a tiny fraction of the sheathing replacement, board removal, barrier reinstallation, and structural framing repair that follows from leaving the cavity open through multiple seasons of Ontario weather. Taking the time to properly insulate these high-movement board perimeters stops boards from buckling before the next storm cycles arrive.
Contact Oleg at Proper Caulking to book an expert on-site structural siding and trim joint assessment for your Oakville, Burlington, or Milton property today. We inspect every vertical butt joint, corner trim interface, and window casing perimeter across your entire exterior layout.
Our professional field crew gives you a completely transparent assessment of exactly what structural sub-wall components are currently at risk. We provide a detailed, honest project estimate backed entirely by our industry-leading 10-year workmanship warranty.
You can visit our dedicated contact page to book your free siding joint assessment to secure your exterior wall cladding system today. To explore our comprehensive array of weatherproofing options for your property envelope, browse our complete installation menu customized to eliminate dynamic draft and moisture tracking points across the Halton region.
Protect Your Wall Cavity and Sheathing From Siding and Trim Leaks
Don’t let degraded vertical seams or failed cladding butt joints buckle your panels, rot out your plywood sheathing, or compromise your framing studs. Contact us for a specialized, professional structural siding and trim joint assessment today.
Proper Caulking – Oakville, Burlington & Milton, Ontario