
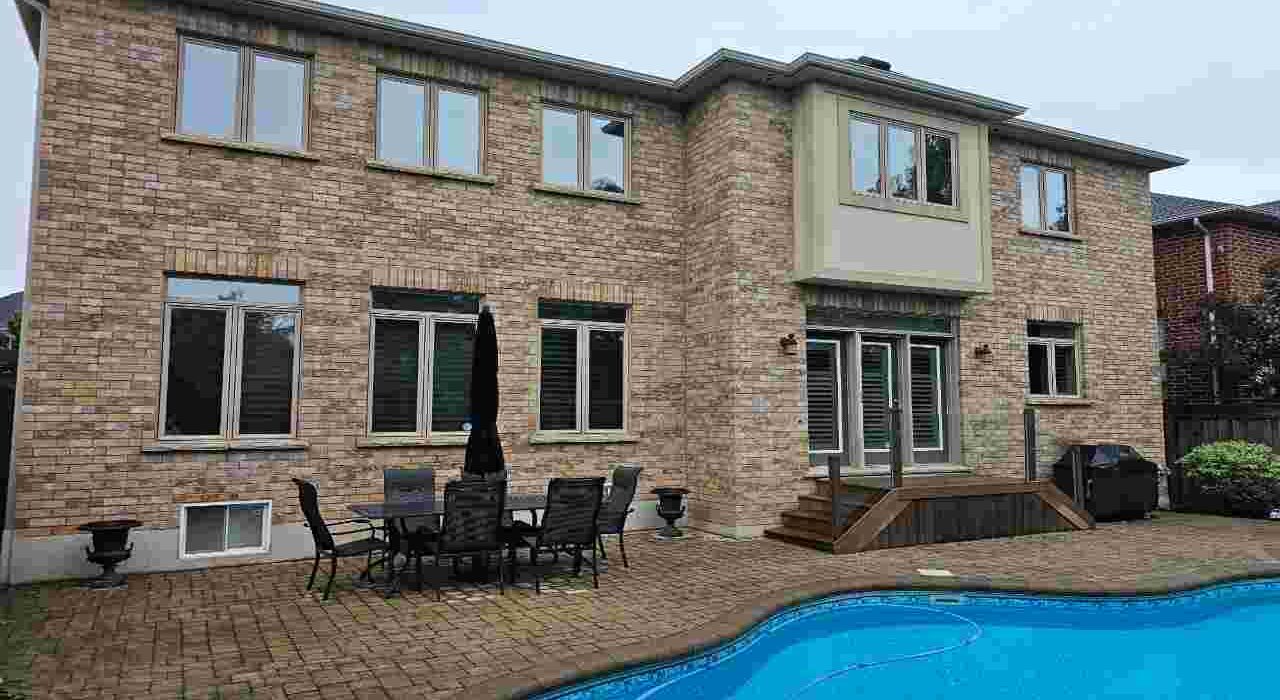
Spring temperature swings strain your home facade. Warm afternoons and cool nights cause rapid wall movement. This constant movement answers a common question: why does caulk crack after a single winter? Burlington homeowners consistently find fresh gaps around windows.
I am Oleg, owner of Proper Caulking. I have spent years diagnosing local weather damage. Cheap retail compounds cannot handle intense Ontario seasons. Our commercial-grade exterior sealant repairs protect your framing permanently.
The Accordion Effect: The Science of Thermal Expansion
Every material in your home’s exterior wall assembly expands when it heats up and contracts when it cools down. That is basic physics. The problem is that different materials expand and contract at completely different rates, and those materials are bolted, adhered, and sealed directly to each other.
Vinyl window frames, for example, have a relatively high thermal expansion coefficient. A large vinyl window frame can shift several millimetres in length between a cold winter morning and a hot summer afternoon.
Aluminum frames behave similarly but at a different rate. Wood expands and contracts differently still, and also absorbs and releases moisture, which adds a second dimension of movement.
Brick masonry and concrete are far more stable thermally but they do move, and they are subject to long-term structural settling that creates slow, permanent shifts in joint geometry.
When you seal the joint between a vinyl window frame and a brick masonry surround, you are bridging two materials that are constantly pulling in different directions at different speeds. The sealant in that joint is not sitting still.
It is being stretched and compressed every single day, responding to every cloud that passes over the sun and every degree of temperature change. A sealant without adequate elasticity treats that movement as a tearing force, and eventually it loses.
The spring and early summer period is when this damage becomes most visible, and the mechanism is more intense than most people expect.
Dark bronze frames, black vinyl window trim, and dark-coloured siding can reach surface temperatures of 60 to 70 degrees Celsius in direct afternoon sun, even when the air temperature is only 25 degrees.
The frame expands significantly under that radiant heat load. When the sun goes behind a cloud or sets in the evening and temperatures drop, it contracts just as quickly.
That daily expansion and contraction cycle in late spring and early summer, when the sun angle is high and the temperature swings between day and night are among the sharpest of the year, is where aging sealant beads get pulled straight off the brick substrate or split down the centre of the bead.
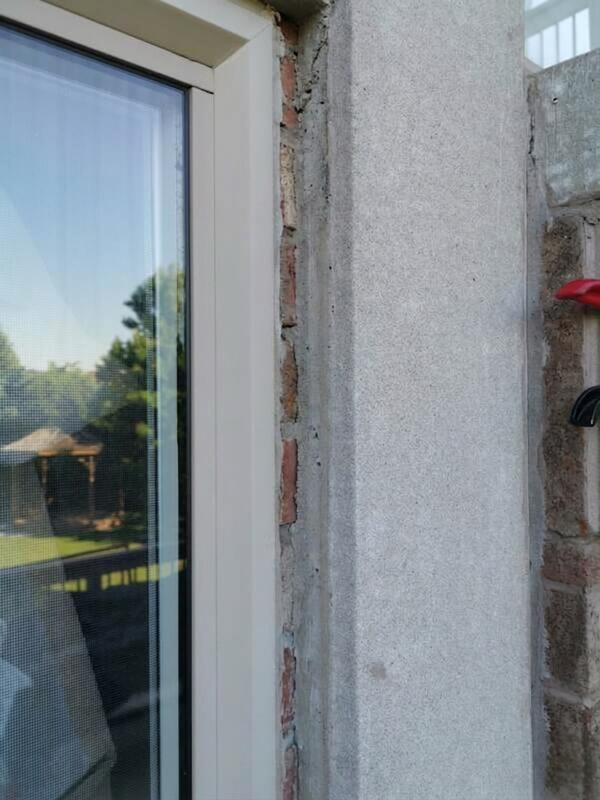
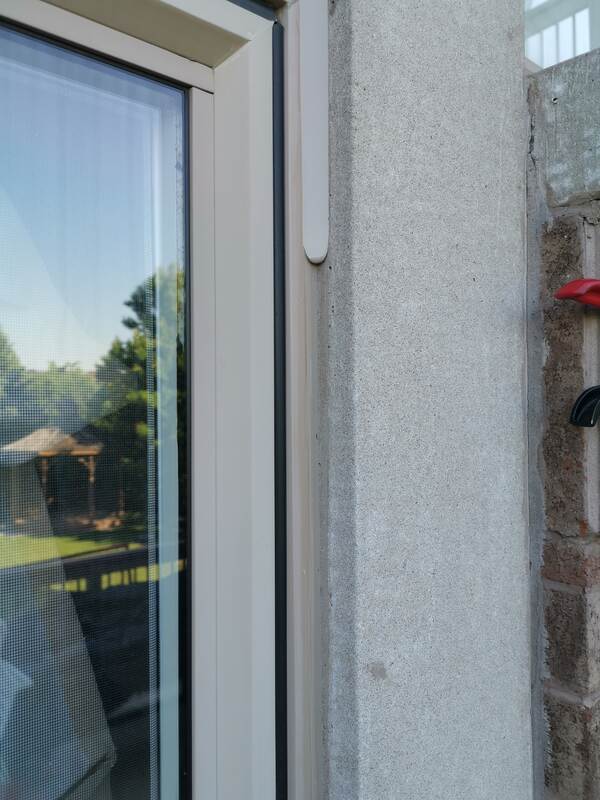
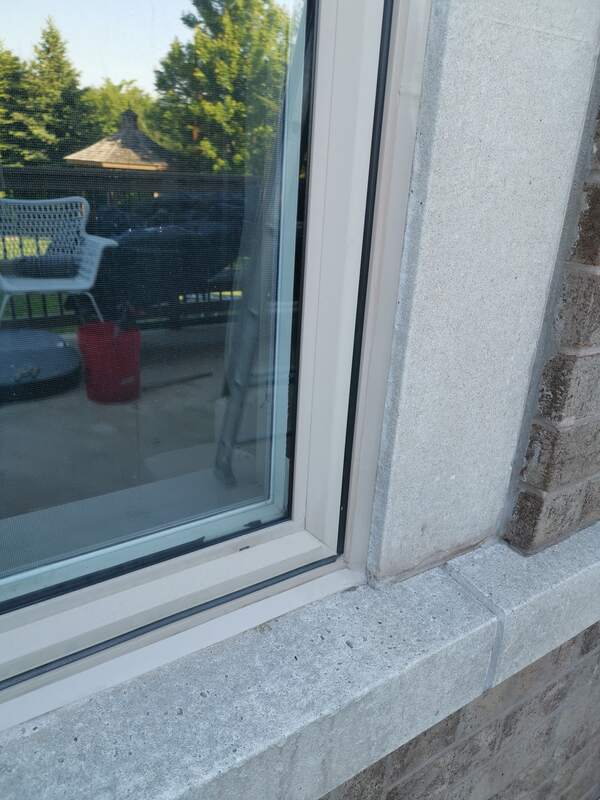
Older properties in neighbourhoods like downtown Burlington and Shoreacres face an additional layer of complexity. Homes in these areas are experiencing long-term structural settling that shifts the geometry of window and door openings incrementally over decades.
A joint that was 8 millimetres wide when the home was built may now be 12 millimetres in some places and 5 in others, because the surrounding masonry has moved. That variable joint width creates uneven stress distribution in the sealant that accelerates failure even in relatively recent applications.
Newer builds in Alton Village, Millcroft, and The Orchard face a different version of the same problem. These homes often feature large vinyl window frames and modern siding joints on open lots with significant sun exposure on multiple elevations.
The vinyl on a south-facing or west-facing wall of a newer Alton Village home sees extreme radiant heat loading for hours every afternoon, driving the expansion cycle hard every single day of the warm season.
Why Retail Acrylic Caulking Fails the Ontario Weather Test
Walk into any hardware store across the Halton region and you will find shelves stocked with cheap acrylic latex caulk selling for a few dollars a tube. The colorful packaging routinely features bold claims suggesting the material is perfectly suited for all exterior building applications.
While these basic consumer products will not physically dissolve in the rain, surviving the extreme seasonal thermal shifts of the Ontario climate is an entirely different matter. Generic retail caulks possess a critically low elongation rating that makes them a severe liability on an outdoor facade.
In industrial building science, elongation defines exactly how much a cured compound can stretch or compress before its molecular structure tears open. A typical hardware store latex product can only handle a marginal 10 to 20 percent structural movement before experiencing total joint failure.
That limited range might seem sufficient until you analyze the real-world expansion forces acting upon your home’s exterior transitions. A large vinyl window casing or extended siding track baking under direct afternoon sunlight will routinely push joint movement far past what a low-grade consumer caulk can tolerate.
The Rapid Degradation Cycle of Brittle Latex Compounds
Standard retail acrylic caulks begin dropping their initial elastic properties within twelve to twenty-four months of installation. Continuous exposure to brutal ultraviolet rays, intense freeze-thaw cycles, and relentless multi-axis thermal strain forces the cheap compound to dry out and turn hard as glass.
Once the material becomes brittle, its ability to function as an active weatherbarrier is completely destroyed. It transforms into a cracked, hollow shell sitting loosely inside your framing tracks, allowing running storm rain to pass freely into your wall cavities.
These professional-tier compounds lock in their high-elongation flexibility through decades of brutal winter freezes and unshielded summer solar loading. They form an aggressive chemical bond against porous brickwork, anodized aluminum, vinyl tracks, and treated wood trim with an adhesive strength that cheap hardware store products cannot replicate.
The physical performance gap between a commercial-grade architectural sealant and a standard box-store latex paste is massive. It represents the literal difference between a resilient barrier that seals your envelope for a decade and a temporary patch that splits open every two years.
Cracked or separated exterior sealants serve as the direct catalyst for structural rot, framing mold, and ruined subfloors during sudden summer downpours. To discover exactly how moisture tracks behind a failed boundary and how to spot the red flags early, read our diagnostic article covering leaking window frames in Burlington to secure your building envelope.
The Proper Restoration Shield: Our 6-Step Thermal-Flex Sealing System
Layering fresh caulking straight over a weathered casing joint creates a superficial seal that tears open long before the next seasonal temperature shift arrives. Structural perimeter transitions located around window frames naturally collect a dense, baked-on layer of environmental contaminants over years of exposure.
This buildup includes active traffic carbon dust, sticky airborne organic sap resins from nearby trees, micro-fines of brick mortar debris, and brittle polymer residue from past amateur repairs. Injecting premium sealants directly over this uncleaned grime means the new material binds strictly to a loose film of dirt instead of locking onto the true architectural tracking.
The compound inevitably unzips and peels away when exposed to the very first intense shift in seasonal weather. Building a permanent weatherseal across these high-exposure wall transitions demands a meticulous breakout that reveals raw, unblemished window trim profiles and clean masonry substrates on both sides of the channel.
Phase 1: Precision Scraping of Weather-Baked Window Perimeter Joints
Our repair technicians completely strip out every trace of degraded, sun-baked compound around the full perimeter of your door and window casings using dynamic oscillating multi-tools, manual detail scrapers, and thin extraction blades.
This painstaking mechanical extraction handles the complex wood-to-vinyl transition channels, aluminum brickmould perimeters, and low-profile concrete sill seams.
A professional window restoration project must protect both the highly visible front aprons and the hidden framing joints sitting along deep masonry recesses to prevent subsurface insulation rotting.
Phase 2: Stripping Environmental Carbon, Atmospheric Grime, and Frame Oxidation
Following complete mechanical extraction, the raw substrate profiles and adjoining brick masonry channels are scrubbed deep with specialized chemical solvents.
Atmospheric carbon dust and frame oxidation oils represent highly specific environmental contaminants that accumulate strictly along exposed window sills over long seasonal cycles.
Once these metal, vinyl, or wood framing profiles are cleared of all film residue, we carefully audit the underlying structural anchoring systems for moisture tracking before any new weatherseal compound can be applied.
Phase 3: Seating High-Density Backing Foam Cushions Along Deep Casing Seams
The deep perimeter channels and variable masonry transitions are wide enough to require an underlying backing rope before we inject any structural polymer. Maintaining a consistent joint depth across these multi-material channels is incredibly important because the thermal movement amplitude at your window frames is substantially higher than at stable center-wall cladding zones.
As detailed in our guide to professional joint preparation, installing this flexible backup foundation is mandatory to prevent your sealant from tearing under severe structural shifting. We utilize high-density closed-cell backing foam for all perimeter window joints because its slick, non-porous skin completely stops driving rainwater from soaking into the wall cavity and freezing during brutal Ontario winter drops.
Phase 4: Tooling High-Movement Polyurethane Barriers to a Strict 2:1 Ratio
Our field crew injects a specified, high-movement industrial polymer deep into every prepared casing seam using professional pneumatic equipment to guarantee consistent bead volume throughout the layout. The finished bead along each linear foot of window trim is hand-tooled to a smooth concave profile that forces running rainwater to slide off the masonry edge and drop harmlessly away from your framing tracks.
On critical structural transitions, this tooled profile is carefully pitched to guide water away from the joint face and shorten moisture dwell time during heavy downpours. The high-performance architectural sealants we deploy at Proper Caulking are formulated to survive severe climate exposure without drying out or losing their adhesive bond.
We enforce a strict 2:1 width-to-depth structural ratio over our high-density closed-cell backing foam cushions to prevent your sealant from tearing under severe structural shifting. For a standard 12mm masonry casing joint, the center ribbon is hand-tooled to an exact depth of 6mm to distribute thermal stress evenly across the material.
These heavy-bodied polyurethanes feature active joint movement thresholds of up to 50 percent or more, fully compliant with the rigorous industrial benchmarks found in the ASTM C920 standard specifications. This flexible durability allows the cured rubber bead to stretch and compress smoothly through Ontario’s freezing winters and blisteringly hot summers without unzipping from your window frames.
Tooling this custom-contoured compound along your window-to-brick transitions forms a permanent, shock-absorbing barrier that easily handles the heaviest water loads streaming down your exterior facade. This professional-tier performance locks in your high-elongation flexibility through decades of brutal seasonal weather cycles.
5 Red Flags That Your Exterior Sealant Has Lost Its Elasticity
A fifteen-minute spring walk around your property reveals the true condition of your unshielded envelope weatherseals. Spotting these subtle material breakdowns early allows you to intercept moisture tracking before it penetrates your underlying framing lines.
Failed exterior joints also contribute to massive seasonal energy loss as air-conditioned currents escape through open gaps. To discover how a compromised building envelope impacts your household overhead, read our article on saving on AC bills with professional caulking to insulate your home completely.
1. Vertical Cracking and Splitting Across the Bead
A sealant that has cracked across its face has exceeded its architectural elongation limit. The torn compound is no longer sealing anything, allowing rainwater and summer humidity to pass freely behind your home’s siding.
2. Delamination and Adhesion Separation From the Wall Substrate
This specific gap represents total adhesion failure where the bond between the compound and your window frame snaps. Even if the main bead looks intact, a tiny separation along one edge means the structural joint is completely open to siphoning rain.
3. Chalky, Brittle, or Crumbly Textures When Pressed
Healthy commercial sealant remains firm yet rubbery when pressed firmly with a fingernail. A weathered bead that crumbles, flakes, or feels hard like dried paint has lost all elastomeric properties, meaning any normal structural settling will shatter it.
4. Sunken or Deeply Hollowed Centerline Profiles
A deeply sunken bead indicates that three-sided adhesion failure occurred during the original contractor application. The caulk mistakenly bonded to the back wall of the framing cavity and tore through its own center as the building shifted.
5. Original Builder Compounds Exceeding 7 to 10 Years of Age
Even expertly tooled commercial sealants possess a finite operational service life. A perimeter joint sealed a decade ago might look passable from your driveway, but the molecular adhesion at the edges is actively failing before summer heat cycles arrive.
Fix Your Structural Shield Before Summer Arrives
Cracked and failing exterior sealant is not a cosmetic problem you can put off until next season. It is an open gap in your building envelope that every summer thunderstorm in Burlington will test directly. The thermal stress that caused the failure does not slow down as the weather warms. It intensifies.
Call Oleg directly for a live response and a free exterior joint flexibility inspection. We work across Burlington and the surrounding Halton Region, and catching a sealant failure before the heavy rain season arrives is always less expensive than dealing with what comes through the gap after it.
See all our professional sealing services at Proper Caulking.
Stop Seasonal Weather From Tearing Your Seals Apart
Don’t let Ontario’s intense freeze-thaw temperature swings compromise your building envelope. Get a free exterior joint flexibility inspection in the Burlington area today.
Proper Caulking – Burlington, Ontario