
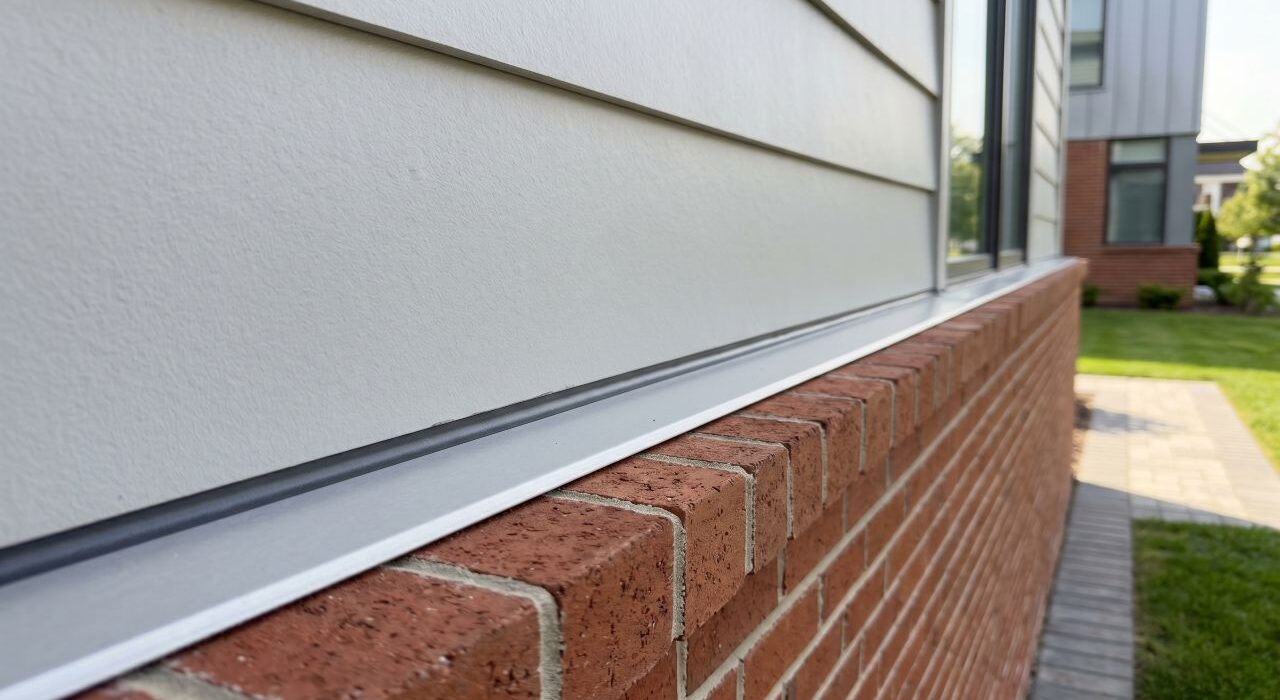
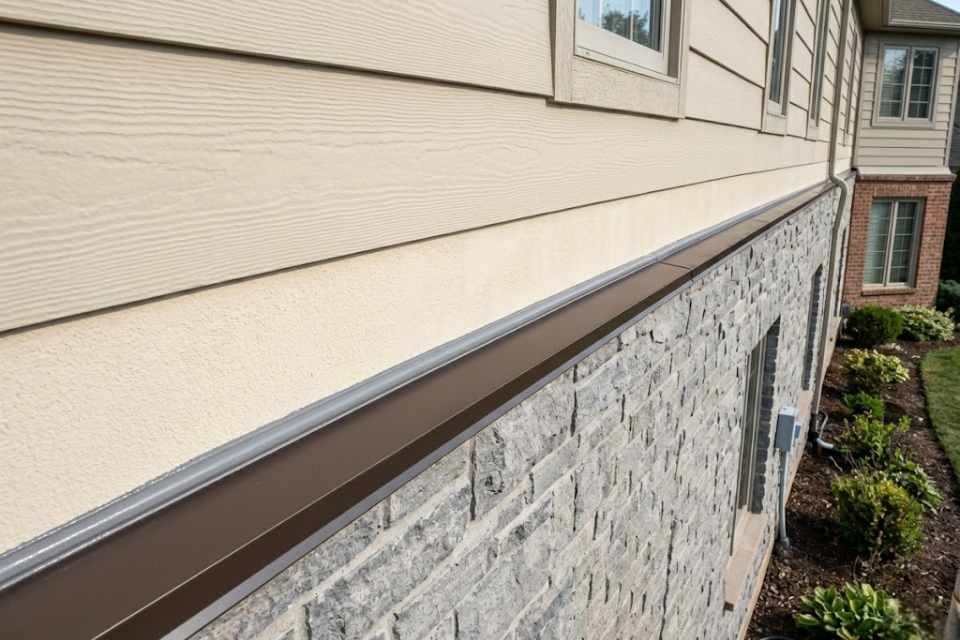
Look along the horizontal layout of your home in Oakville, Burlington, or Milton. The spot where your upper siding transitions down to a lower, protruding brick veneer base is your water table ledge. Managing this transition relies on specialized water table flashing caulking to block hidden rim joist rot and wall-cavity lateral siphoning.
That offset masonry shelf is one of the most high-risk water collection areas on your home’s exterior facade. It has no protective roof overhang or shielding soffit panels to deflect heavy rain away from its horizontal track.
Most local property owners never inspect this horizontal metal flashing lip until wood rot settles into the main floor structure. By the time soft spots appear inside, moisture infiltration has usually been active behind the cladding for multiple seasons.
Ledge Physics: Gravity Troughs and Multi-Material Solar Tracking
The water table ledge operates as a major hydraulic collection point built straight into your home’s facade layout. The upper wall surface stretching above the shelf acts as a massive vertical funnel during any rain event. Every single liter of water sheeting down the siding, stucco, or cladding face above the ledge drops directly onto this horizontal offset projection.
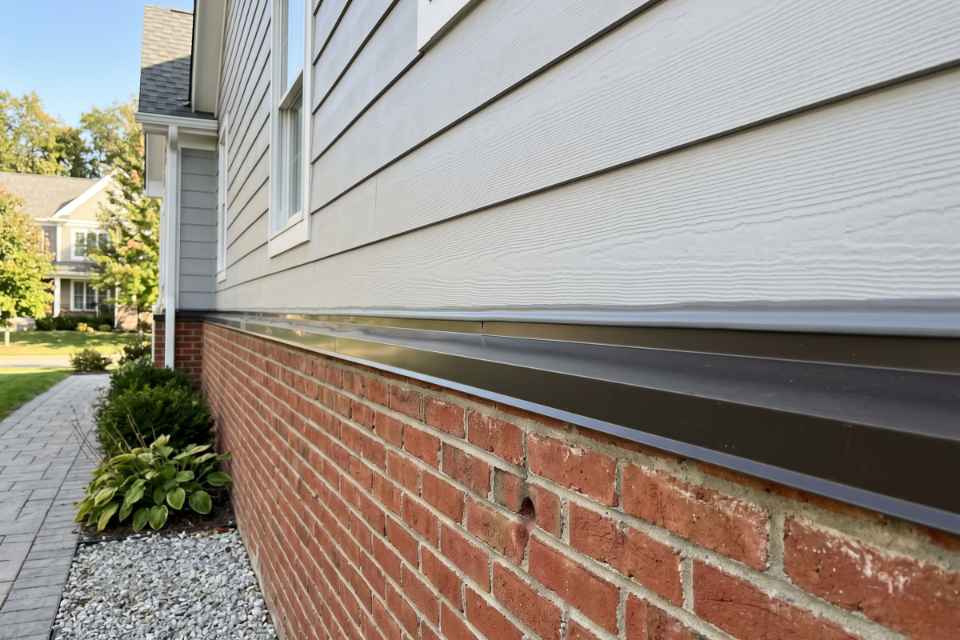
On a standard two-story property during a heavy summer storm, the sheer volume of water collecting at the water table ledge per linear meter of wall length is substantially greater than at any window sill or door threshold on the same elevation. All of that cascading water is directed by gravity toward the back edge of the flashing, where the metal apron meets the upper face of the brick veneer base below it.
The metal Z-flashing track at that junction adds an intense thermal stress dimension that severely compounds this hydraulic problem. Thin aluminum or galvanized steel flashing absorbs direct afternoon solar radiation intensely, expanding along its full horizontal run at a rapid rate determined by metal’s high thermal expansion coefficient.
The heavy clay brick masonry directly underneath it possesses an immense thermal mass and responds to the same heat slowly. It expands at a much lower rate and with a significant time delay compared to the thin sheet metal. This differential movement creates a relentless shearing force along the horizontal joint between the flashing edge and the upper brick face every afternoon the sun contacts that elevation.
Because different architectural elements expand and contract along completely separate axes, calculating the precise physical tolerances of each substrate is a strict structural safety requirement.
Completely blocking subsurface moisture tracking along these horizontal cladding transitions demands compliance with the core installation criteria outlined in the FEMA Building Science structural design parameters registry.
This advanced structural design baseline ensures that our commercial-grade non-sag polyurethanes possess the specific elongation and compression tolerances needed to withstand intense elemental loading without undergoing cohesive or adhesive joint failure.
Utilizing these recognized federal engineering benchmarks allows our field crews to precisely calculate independent substrate shifting rates, guaranteeing that our completed horizontal weatherseals will never tear or unlock when exposed to intense winter freezing cycles.
Consumer-grade acrylic and retail latex caulks applied to this complex joint rapidly fail under this shear loading within one to two seasons. This material breakdown leaves the critical ledge-to-brick interface wide open to the full, unshielded hydraulic water load it collects.
The siding and trim perimeter weatherseals situated directly above the water table ledge face a related set of physical movement stresses.
Our article on siding and trim caulking covers how the cladding joints above the ledge line must be properly maintained to prevent water from tracking behind the panels and reaching the structural shelf in the first place.
The Hidden Rim Joist Trap: Saturated Floor Plates and Main-Floor Sill Rot
The water that reaches an open water table shelf seam does not simply run off the ledge projection and drip harmlessly to the ground. Capillary action draws moisture backward along the underside of the metal flashing, pulling it directly into the cavity between the flashing apron and the brick veneer face.
At the water table elevation on most residential construction across Oakville, Burlington, and Milton, your structural rim joist and main-floor sill plate sit directly behind the wall assembly at or near the water table ledge level.
The rim joist is a full-depth lumber member sitting perpendicular to the floor joists at the building perimeter, providing lateral support to the floor system and bearing the exterior wall load above it.
The sill plate resting below it sits on top of the foundation wall and is the lowest structural timber in the above-grade wall assembly. Both elements sit in the direct migration path of tracking moisture that siphons inward through a failed water table flashing seal.
Rim joists and structural sill plates that absorb moisture repeatedly through multiple seasons develop deep wood rot that remains completely invisible from the interior. There is no wall stain, no ceiling mark, and no obvious visual indicator inside the home until the rot has progressed far enough that the structural framing has softened and lost its load-bearing capacity.
The first visible interior sign is often a cold floor along the exterior wall perimeter in winter, caused by wet, compromised insulation inside the rim joist cavity. The second sign is a soft spot or physical deflection in the main floor flooring adjacent to the exterior wall.
By those advanced stages, the structural timber remediation required involves opening the wall assembly, replacing the rotted structural framing, treating for mold in the insulation cavity, and completely rebuilding the building envelope above the repair location.
The vertical contraction joints built into the brick veneer below the water table ledge must also be maintained separately as part of a full home maintenance program.
Our article on brick masonry expansion joint caulking covers those vertical relief tracks and their independent elastomeric sealant requirements to keep your lower foundation walls fully armored.
Our Specialized 4-Phase Brick Ledge Restoration Workflow
Smearing a fresh layer of caulk over an existing, degraded water table flashing seal creates an unstable bond that splits during the very next storm. The horizontal footprint of a structural brick ledge naturally intercepts every bit of environmental debris washing down from the upper stories.
This tracking grime includes microscopic atmospheric dirt, active moss spores, powdery mineral salts wicking from the mortar, and oxidized chemical residues from the original weatherseal.
Injecting premium sealants over this hidden contamination layer means your material binds directly to the dirt instead of the actual structural framing. A permanent, weather-tight installation requires stripping both faces completely back to raw, unblemished building substrates.
Phase 1: Horizontal Channel Extraction of Sun-Baked Ledge Compounds
Our field crew completely strips away every millimeter of failing original compound along the horizontal home perimeter using dynamic oscillating multi-tools, mechanical hook scrapers, and detail blades. Because this specific junction runs horizontally, trapped dirt packs into the channel much deeper than what you typically find inside vertical window casings.
Complete mechanical breakout involves carving out dense pockets of compacted organic soil, green moss, and ground lichen that thrive inside these wet horizontal tracks. On expansive home facades where the metal drip cap runs uninterrupted across the entire width of the building, we clear the channel in controlled, independent sections to maintain a clean workspace.
Phase 2: Stripping Grade-Level Splash Contaminants and Efflorescence Salts
Following mechanical extraction, the raw flashing metal and adjacent clay brick faces are deeply scrubbed with industrial solvents. Managing white efflorescence powder is highly critical along horizontal ledge transitions because the constant presence of pooling water rapidly accelerates mineral migration from inside the masonry core out to the surface.
This chalky alkaline scale ruins molecular sealant adhesion and must be fully dissolved, neutralized, and rinsed clear of the bonding track before your new compound is injected. Once the metal plates are chemically cleaned, we treat any trace surface oxidation and apply a specialized metal primer to guarantee a permanent structural weld.
Phase 3: Seating Closed-Cell Expansion Buffers Along Long-Run Metal Tracks
Mid-wall horizontal water table gaps are wide enough to require an underlying backing rope before any compound is injected. On extended horizontal flashing lines, seating this foam support demands extreme precision to maintain a uniform, compressed fit across the entire linear span, especially at overlapping sheet joints.
As outlined in our guide to professional joint preparation, installing this flexible backup foundation is mandatory to prevent your sealant from tearing during intense thermal shifting. We use high-density closed-cell backing foam for all horizontal masonry ledges because open-cell foams act like a sponge, trapping destructive moisture directly against your structural framing.
Phase 4: Tooling Ultra-Elastomeric, Non-Sag Construction Barriers
Our technicians inject a specified, high-movement industrial polymer along the clean horizontal track using professional equipment. This specialized application process guarantees completely consistent bead volume across the entire span.
We use a heavy-bodied non-sag formulation for these horizontal shelf transitions. This stops wet, uncured sealant from sagging downward under gravity and creating an uneven profile.
The finished bead is hand-tooled to a smooth, outward-sloping concave angle. This profile forces cascading rain to flow over the brick veneer rather than pooling along the seam.
The high-performance architectural sealants we deploy are formulated to survive severe climate exposure without drying out. These specialized heavy-duty compounds meet strict building industry engineering standards for long-term weather sealing.
This flexible durability allows the cured bead to stretch and compress smoothly through Ontario’s freezing winters and blisteringly hot summers. The rubberized seal handles extreme seasonal shifting without unzipping from the metal flashing tracks.
Tooling this custom-sloped compound along your mid-wall transitions forms a permanent, shock-absorbing barrier. This flexible seal easily handles the heaviest water loads streaming down your exterior facade.
5 Signs Your Water Table Flashing Joint Needs Immediate Attention
A mid-wall inspection at the water table ledge elevation on each building face identifies every active sealant failure before moisture reaches the rim joist or sill plate. Spotting these subtle visual triggers early lets you correct the tracking track before it targets your home’s main floor framing.
Left unsealed, these expanding gaps also invite destructive wood-boring bugs and burrowing ants to invade your structural framework.
To discover how unshielded outdoor gaps turn into active pest highways, read our article on pest prevention window caulking to learn how to insulate your property boundaries.
1. Open Gaps Between the Flashing Apron Edge and Brick Veneer
Any visible gap between the flashing apron edge and the brick face below it is an active water entry point. This horizontal separation delivers capillary siphon moisture straight toward the structural rim joist with every rain event that falls above the ledge.
2. Centerline Shearing and Adhesive Metal Flashing Separation
Sealant that has sheared through its center or released from the metal flashing face is exhibiting classic differential thermal expansion failure. Once the material tears or delaminates, it is no longer providing any moisture protection across the horizontal run.
3. White Chalky Efflorescence Streaks Tracking Down the Brickwork
White, chalky efflorescence deposits appearing as streaks running down the brick veneer below the flashing apron confirm active water movement through the joint. This mineral scaling proves that tracking moisture is actively carrying dissolved salts outward from the hidden masonry behind the flashing.
4. Cold Main Floor Interior Perimeters During Winter Months
A cold main floor perimeter adjacent to an exterior wall with a water table ledge during winter indicates that your rim joist cavity insulation has been completely compromised by moisture absorption. This internal draft symptom points directly to an active water table sealant failure sitting right outside the wall.
5. Original Builder Seals Exceeding 10 Years of Total Exposure
Any water table flashing sealant that has not been professionally replaced since the original construction is operating well beyond its expected service life. Even if the old compound appears smooth from a distance, its deep molecular adhesion against the conflicting material surfaces has completely vanished.
Seal Your Ledge Before the Rim Joist Pays the Price
A compromised water table flashing joint collects massive amounts of sheeting rainwater, channeling it straight toward the structural floor framing at your home’s main level. Left unsealed, this moisture migration reaches your rim joist and sill plate, which are critical load-bearing elements hidden deep behind your finished interior walls.
Intercepting this degradation early costs a tiny fraction of the thousands of dollars required for emergency framing remediation or structural timber reconstruction. Deploying a premium, climate-matched polymer barrier permanently blocks this subsurface moisture tracking and stabilizes your load-bearing framing plates before rot takes hold.
Coordinate an On-Site Water Table Joint Analysis
Contact Oleg at Proper Caulking to schedule a specialized mid-wall perimeter structural analysis for your Oakville, Burlington, or Milton property today. Our technical field crew methodically checks every horizontal brick ledge, metal drip edge profile, and multi-material cladding transition across your entire home footprint.
Our technical field division delivers a precise, line-item summary detailing where your horizontal barriers are breaking down and which structural framing pockets are exposed to water tracking. We completely eliminate future risk by securing our specialized utility weatherproofing applications with a comprehensive 10-year trade warranty on all labor.
Deploying this custom perimeter shield early in the spring weather window is the most reliable way to insulate your exterior utility connections before peak storm cycles hit the Halton region.
Protect Your Rim Joists and Framing From Leaky Brick Ledges
Don’t let cracked water table seams or failed flashing joints rot out your main-floor sill plates, buckle your subfloors, or foster hidden mold growth. Contact us for a specialized, professional water table flashing joint assessment today.
Proper Caulking – Oakville, Burlington & Milton, Ontario