
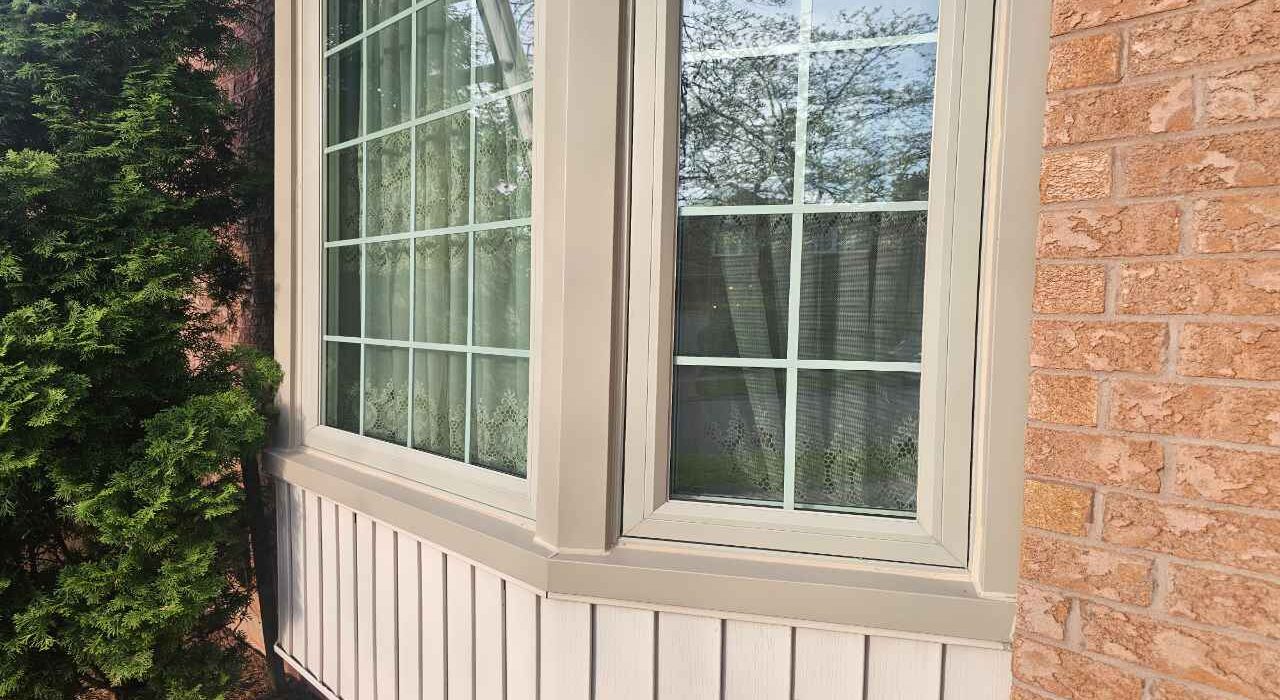
Bay window exterior caulking deals with an entirely different structural animal than a standard flat wall window. A projecting 3D frame module sits exposed on three or more sides, and it experiences environmental shifting stresses that flat-mounted frames never encounter.
Heavy wind currents and driving rain strike these protruding box assemblies from multiple angles at once. The multi-panel junctions where each angled frame section meets the next become high-risk leak zones precisely because of that compound exposure.
Oleg, owner of Proper Caulking, has spent years sealing these high-exposure projecting boundaries across Oakville, Burlington, and Milton. His premium elastomeric polymer systems permanently stop the cold floorboard drafts that plague bay window alcoves.
The Three Structural Failure Points Unique to Projecting Window Units
A bay window assembly is not a single, unified weather barrier. Instead, it is a complex combination of several distinct structural failure points working together, and each one demands its own specialized sealing attention.
Vertical Corner Mullion Seams
Where individual window frame modules slam together at a thirty-degree or forty-five-degree angle, a vertical corner mullion seam is created. Intense thermal movement across these complex, multi-angle junctions splits standard box-store caulk apart far faster than it would on a flat, single-plane window casing.
If you are currently experiencing active water leaks tracking down your main vertical window trims, you can read our master troubleshooting guide on window frame leaking water to trace the internal path. These multi-panel framing joints are constantly pulling in different directions as temperature loads shift across the facade.
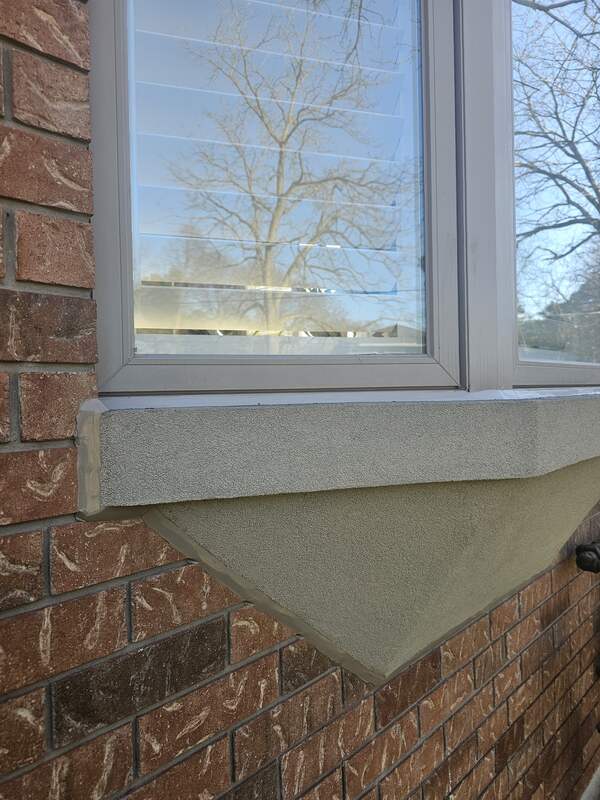
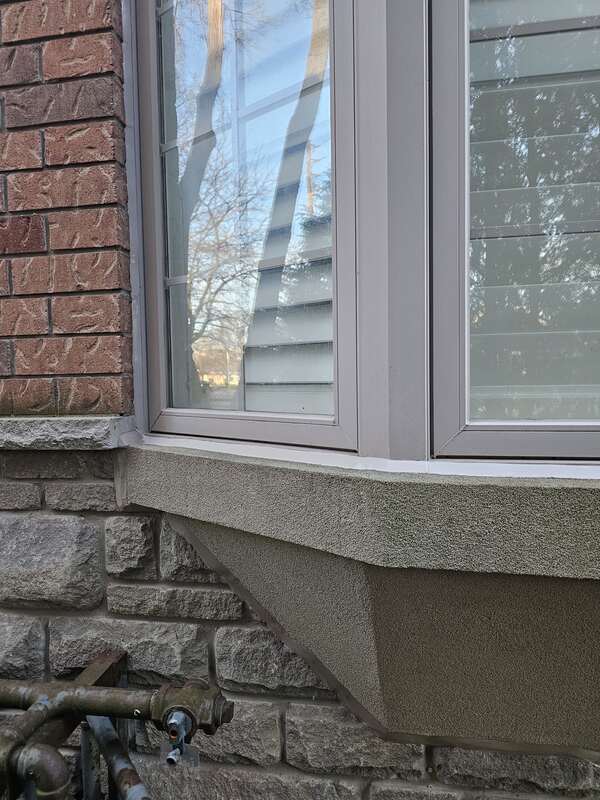
The Cantilevered Floor Cavity: The Cold Room Effect
Directly beneath the window glass sits a horizontal bottom panel that extends straight out past your main concrete basement foundation wall. This cantilevered floor cavity floats completely unshielded from the elements, leaving the lower frame tracks exposed to harsh rising winds.
When the underlying perimeter seal around this cantilevered box fails, freezing winter air siphons directly beneath your interior floorboards. This structural air-barrier failure creates the icy, drafty room effect that local property owners feel across their toes near the bay window alcove.
The Independent Roof Skirt and Metal Cap Line
A separate mini-roof canopy, often finished in architectural copper or painted metal, caps the top of the projecting bay window box. This independent roof skirt takes a far heavier pounding from stormwater than a standard flat window drip cap.
Because the canopy projects outward, it must catch and shed pouring rain from three directions simultaneously rather than just one flat face. These demanding multi-angle water shedding parameters must align perfectly with the rigorous architectural flashing and enclosure integrity criteria managed within the official Canada Masonry Design Centre codes and standards database.
Our Specialized 4-Phase Bay Window Sealing Framework
Sealing a projecting bay window unit correctly means treating the corner mullions, the cantilevered floor cavity, and the roof skirt line as three separate, connected systems rather than one continuous bead. Slapping a single layer of retail caulking over the visible frame joints while ignoring the underlying structural expansion tracks leaves your primary sub-surface water entry points completely open.
True environmental protection demands a highly systematic approach that treats the entire projecting window module as a continuous, watertight defense line. Failing to address all three paths simultaneously guarantees that cascading winter rain will continue to track beneath your frame through adjacent framing cracks.
Phase 1: Deep Cavity Stripping and Lamination Excavation
Our technical field crew completely extracts all failed builder-grade caulk and old foam tapes deep inside the tight vertical mullion tracks to expose bare structural framing. These narrow angled channels require specialized detail tools rather than standard scrapers, since the joint geometry at a thirty or forty-five-degree corner does not allow for a flat blade approach.
Leaving any residual oil, dust, or old store-bought residue inside the track completely destroys the molecular bonding capabilities of your new material. Stripping the joint down to a raw, unblemished structural foundation is the only way to ensure the upcoming commercial polymer establishes a permanent weatherseal.
Phase 2: Compressing High-Density Closed-Cell Backer Insulation
We pack resilient backing foam strips into the wide horizontal under-floor joints beneath the cantilevered floor panel. This underlying foam cushion sets the precise material depth required to prevent three-sided adhesion failure within the cured compound.
Setting this flexible two-point configuration is absolutely mandatory because the floor box moves independently against the main wall. As detailed in our comprehensive backer rod window sealing guide, providing this underlying depth control allows the finalized bead to expand and contract seamlessly without tearing loose from the substrates.
Phase 3: Injecting Non-Staining Structural Elastomeric Polymers
Our installers inject a specified, heavy-bodied neutral-cure compound into every prepared joint track. This specialized chemistry matters specifically at a bay window because three or more different frame materials often meet within centimetres of each other at the corner junctions.
The industrial-grade compound cross-links cleanly to vinyl, wood, or aluminum substrates without staining your surrounding exterior finishes or bleeding oils into adjacent masonry. This non-staining property ensures your premium building facade components maintain their clean architectural lines throughout decades of unshielded climate exposure.
Phase 4: Tooling the Downward-Sloping Air Barrier Profiles
The fresh material is instantly hand-compressed into crisp, concave profiles engineered to force wind-driven rain to shed cleanly off every angled panel face. Special technical attention is given to the roof skirt seam, where the downward slope must direct water completely away from the corner mullion joints below it.
This sharp downward pitch forces pooling stormwater to shed cleanly away from your wall cavity, while aligning perfectly with the rigorous exterior window safety parameters governed by the official Codes Canada publications index. The finished sealant collar is instantly tools-compressed to ensure an airtight finish that accommodates severe frame vibration and intense thermal shifts.
Prevent Costly Cantilevered Frame Decay and Sub-Floor Remediation
Leaving projecting window seams unsealed lets water and cold air work into your cantilevered floor box for years before anyone notices the structural cost. This slow, hidden water tracking saturates the internal wood framing long before interior drywall begins bubbling or toxic mold spores take hold.
Once the moisture breaks through your indoor paint or warps your window tracks, the hidden decay is already advanced. Replacing rotted, load-bearing cantilever floor joists and ruined structural insulation afterward costs thousands more than a single preventative seal would have cost upfront.
Secure Your Protruding Building Envelope Boundaries Today
Coordinate a zero-obligation on-site visual assessment with Oleg at Proper Caulking before freezing winter temperatures arrive. Our technical field division carefully evaluates your sloped roof skirts, vertical corner mullions, and bottom frame joints across Oakville, Burlington, and Milton to catch failures early.
Every premium bay window installation we execute stands backed entirely by our signature 10-year workmanship warranty against material peeling. Protect your lower structural framing paths and lower your winter energy bills by dropping a line to our local dispatch team to secure your home today.
Stop Freezing Drafts and Cantilevered Floor Rot
Don’t let separated vertical corner mullions or open under-floor joints turn your bay window alcove into an icy cold room. Contact us for a specialized, professional bay window exterior caulking assessment today.
Proper Caulking – Oakville, Burlington & Milton, Ontario
Frequently Asked Questions: Bay Window Exterior Caulking
Why is the floor inside my bay window alcove always freezing cold during winter?
The floor inside your bay window alcove feels freezing cold because the perimeter seals around the horizontal under-floor cantilever box have completely failed. This structural air-barrier gap allows freezing winter winds to siphon directly beneath your interior floorboards, turning the empty cavity under your window seat into an active cold room.
Do projecting bow and bay windows require different sealant compounds than flat brick windows?
Yes, projecting units experience multi-angle structural wind-loading and thermal forces that flat window frames never encounter. Sealing these shifting tracks demands commercial-grade, neutral-cure architectural silicones because multiple completely different substrates like vinyl, aluminum, stucco, and brick meet within centimeters of each other at the angled junctions.
Is it safe to apply standard expanding spray foam underneath a cantilevered window box?
No, standard hardware-store expanding spray foam lacks the elastomeric properties to handle ongoing structural shifting and degrades rapidly under unshielded atmospheric exposure. True weatherization requires extracting old materials completely, compressing a high-density closed-cell backing foam strip into the gap, and tooling a heavy-bodied commercial polymer collar over the face.
How often should the vertical mullion corner joints on a bay window unit be inspected?
Homeowners across Oakville, Burlington, and Milton should visually audit their projecting vertical corner mullion joints at least once every twelve months. Because these multi-panel modules twist minutely under extreme Ontario seasonal temperature drops, spotting hairline separation early intercepts hidden framing rot long before water saturation warps your interior drywall lines.