
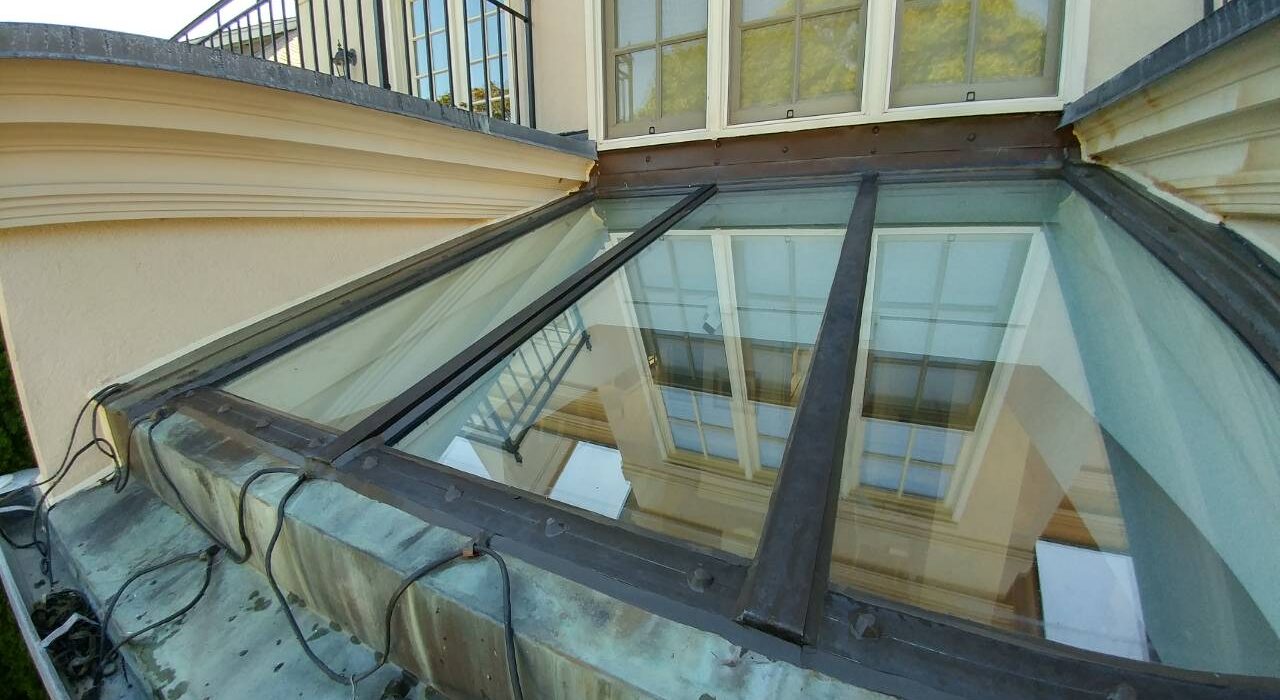
When preserving a luxury home anywhere in the Halton Region, executing professional exterior skylight caulking is a critical building envelope requirement to stop top-down roofline leaks. Vaulted sunrooms, attic conversions, and kitchen skylights bring gorgeous natural light deep into custom estates across Southeast Oakville, Burlington, Roseland, and Milton.
However, because these horizontal or angled glass installations sit directly on the roof slope, they take the unshielded brunt of pounding rain, pooling meltwater, and winter ice dam pressure. The thin perimeter weatherseal wrapped around these exposed frames operates as your primary defense line, protecting raw timber rafters and interior drywall ceilings from catastrophic overhead water migration.
Builder-grade or aged sealants cooked by intense overhead solar heat quickly turn brittle, crack open, and fail under these extreme, high-stress roofline weather conditions. Most local homeowners never think to inspect these overhead glass assemblies until a heavy rainstorm triggers active ceiling drips and bubbling paint right above their heads.
The Physics of Solar Radiation Fatigue on Roofline Joints
A roof surface in a southern Ontario summer is a fundamentally different thermal environment than a vertical exterior wall.
South-facing and flat roof surfaces regularly exceed 65 degrees Celsius under direct afternoon sun in July and August, even when ambient air temperatures are in the mid-twenties.
That extreme surface heat combined with unshielded UV radiation creates a degradation condition called solar radiation fatigue, which destroys standard retail caulking far faster than any vertical wall application.
Retail acrylic and latex caulks applied at skylight perimeters absorb that heat, lose their polymer elasticity within one to two seasons, and begin to shrink, crack, and pull away from the metal flashing and glass frame surfaces they were meant to bond.
The reason roofline seals fail faster than window seals is not a mystery. It is a direct consequence of the thermal load differential between horizontal and vertical exposures.
For a full explanation of why does caulk crack under extreme local temperature cycling and what the physics of thermal expansion do to retail sealant compounds, our article on Burlington weather caulking damage covers the degradation mechanics in detail.
For the regulatory framework governing roof assembly weatherproofing, the International Residential Code’s chapter on roof flashing and building envelope drainage requirements defines the compliance standard for skylight installation and perimeter sealing.
The Diagnostic Illusion: Glass Sweat vs. Active Roof Infiltration
Not every moisture sign at a skylight indicates a weatherseal failure. Knowing the difference between harmless condensation and a structural leak determines whether you need a dehumidifier or a professional sealant restoration.
The following indicators help homeowners distinguish normal glass behaviour from active water infiltration requiring immediate attention.
Understanding Surface Glass Sweat and Interior Room Humidity
Condensation forming on the interior face of skylight glass, particularly on cold mornings, is normal surface behaviour caused by warm humid interior air contacting the cold glass surface.
It wipes away cleanly and does not leave staining on surrounding drywall or ceiling finishes. If it is occurring heavily across multiple windows in the house as well, it is a whole-home humidity management issue rather than a skylight problem.
For a deeper understanding of how to distinguish surface condensation from structural seal failure, our article on window condensation seal failure covers the diagnostic framework for differentiating glass sweat from true IGU and perimeter seal compromise.
Tracking Water Stains and Bubbling Paint Around the Drywall Ceiling Box
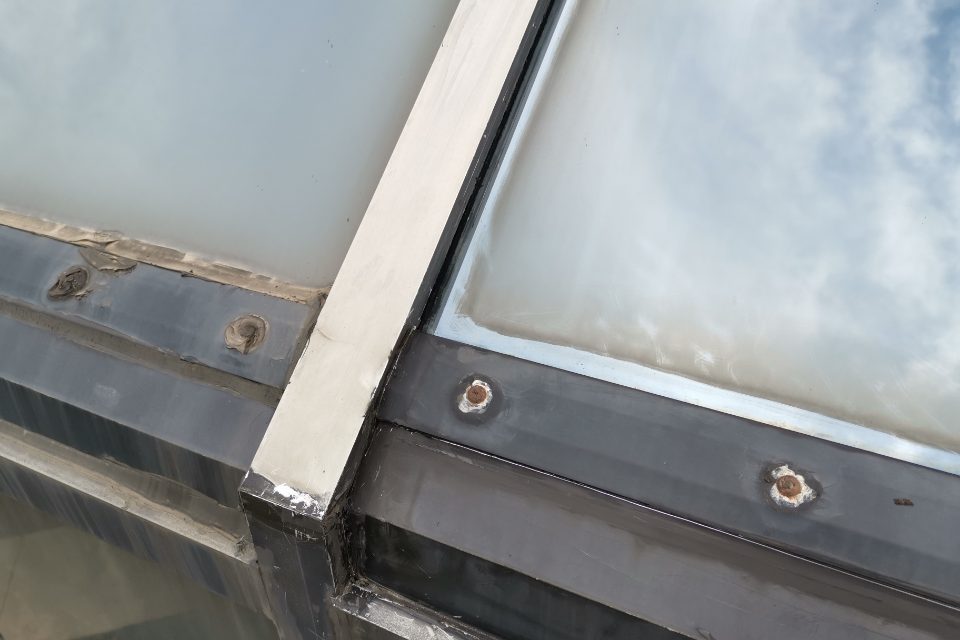
Water staining on the drywall surrounding the skylight ceiling opening, paint that is bubbling or peeling at the ceiling perimeter, or a tideline of discolouration running outward from the skylight frame are reliable indicators of active infiltration.
These stains are not caused by condensation. They are caused by water that has entered through the perimeter seal and migrated through the framing and ceiling assembly before emerging at the finish surface.
Active Water Drips Falling After Heavy Local Rainstorms
Dripping from the skylight frame or ceiling opening during or immediately after a heavy rain is unambiguous evidence of active perimeter seal failure.
The location of the drip on the interior may not directly correspond to the breach point on the exterior, as water entering at the upper edge of the frame may travel along rafters or decking before dropping at a lower interior point.
Winter Ice Damming and Water Paths Behind Metal Roof Flashings
Ice dam formation at the skylight frame perimeter is a specific wintertime failure risk that does not affect vertical windows.
When snowmelt water running down the roof slope encounters the skylight frame and refreezes at the cold metal flashing edge, the resulting ice dam backs liquid water up under the flashing and into any gap in the perimeter seal, even one too small to admit rain under normal conditions.
A skylight perimeter seal that appears sound under summer inspection may still be admitting water in winter through ice dam pressure.
Hidden Timber Rot and Rafter Decay Creeping Inside the Attic Frame
The most damaging infiltration scenario is one with no visible interior signs for multiple seasons.
Water entering through a failed skylight perimeter seal can follow the skylight curb frame, track along roof decking, and absorb into the structural rafters surrounding the skylight opening without producing any visible interior stain until the moisture-affected wood has been absorbing water long enough to initiate rot.
Our article on window frame leaking water and hidden wall cavity moisture migration describes how water entering at a high elevation in a building assembly travels downward to cause damage at locations that do not correspond to the entry point, making source identification without a full envelope inspection difficult.
The Surgical Workflow for Overhead Glass Envelope Weatherproofing
Applying new caulk over a degraded roofline skylight seal is structurally useless and often makes the situation harder to remediate correctly later.
Roofline sealant surfaces accumulate atmospheric soot, roof shingle grit, algae deposits, and oxidised polymer residue that make adhesion of any new compound to the existing surface essentially impossible.
New material applied over this contamination bonds to the debris layer rather than to the metal flashing or glass frame substrate, and it fails at that interface under the first thermal expansion cycle.
Phase 1: Clearing Rooftop Shingle Grit and Baked Contamination
All existing sealant around the full skylight perimeter is removed completely to bare substrate using oscillating tools, detail scrapers, and highly specialized cleaning solvents.
Aluminum flashings and anodized frame surfaces require careful solvent selection to clean the adhesion zone without etching or discoloring the metal finish.
The mechanical extraction must include the full depth of any failed sealant inside the joint between the skylight curb and the surrounding roof deck flashing.
Scraping away this hidden material ensures a pristine, contaminant-free channel for a fresh, uncompromised bond.
Phase 2: Inspecting Elevated Curb Framing and Timber Decay
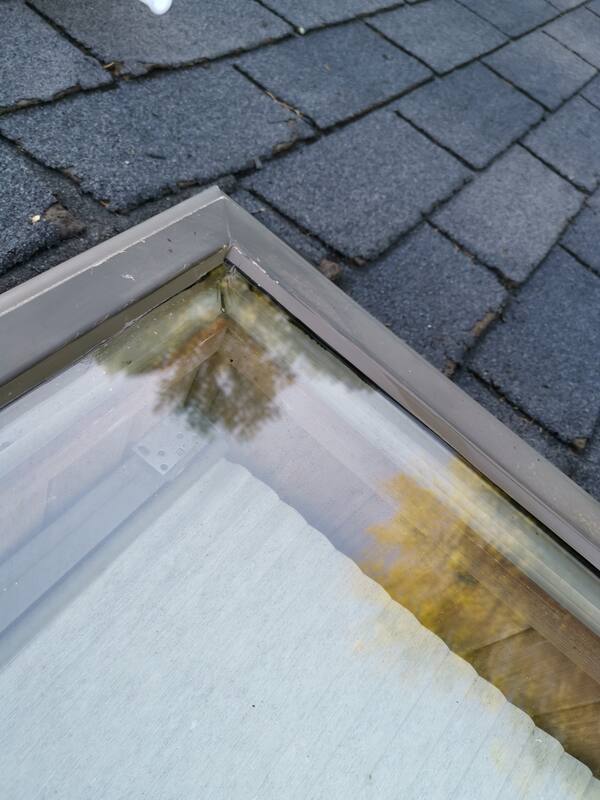
With the perimeter cleared, every face of the structural joint is assessed for corrosion on metal components, delamination of flashing layers, and early wood rot.
A skylight curb that has been absorbing moisture through a failed seal for multiple seasons may show wood degradation that must be addressed before resealing.
Resealing over an actively compromised curb frame simply encloses the damaged material. This shortcut allows rot to continue spreading invisibly behind a new seal, leading to catastrophic ceiling drywall failure later.
Phase 3: Establishing Deep Curb Void Backing for Roofline Thermal Cycling
Wide expansion gaps around the skylight curb base, which are common on older skylight installations where the original foam backing has compressed or degraded, require a backer rod at the correct depth before sealant injection.
Our guide to professional joint preparation covers the full structural rationale for installing a foam backer rod in deep overhead joints, and why the two-point adhesion geometry it creates is the baseline requirement for elongation performance under the extreme thermal cycling of a roofline application.
Closed-cell backer rod is specified for overhead and roofline applications because its non-absorbing surface does not retain moisture behind the sealant face in a location where gravity and capillary action would continuously draw water inward.
Phase 4: Tooling Seamless Water-Shedding Elastomeric Profiles
Our technician injects the specified commercial elastomeric sealant around the full skylight perimeter using professional equipment. This careful delivery method ensures a completely consistent bead volume across all four frame sides, including the critical lower edge where water pooling risk is highest.
The finished bead is immediately hand-tooled to a smooth, downward-sloping profile to ensure complete adhesion to both the skylight frame and the surrounding flashing metal. Particular technical attention is given to the upper and side frame edges where wind-driven rain approaches under intense positive pressure.
We apply extra material compression across the high-stress frame corners where bead continuity is most frequently compromised by previous poor installation techniques. The specialized, weather-matched compounds we deploy utilize cross-linked chemistry to maintain an airtight, unyielding bond against severe high-altitude roof exposure.
These rigorous architectural weatherproofing metrics align perfectly with the modern moisture-shielding and structural assembly definitions detailed inside the official Tarion Construction Performance Guidelines manual.
This flexible material engineering ensures the cured rubberized compound expands and compresses smoothly through intense Ontario freeze-thaw cycles without tearing loose from your shifting glass panels or metal frame boundaries.
5 Signs Your Skylight Seal Needs Immediate Attention
A roof-level inspection at the start of each season identifies every active failure point before it advances to interior damage. These are the conditions that require professional attention.
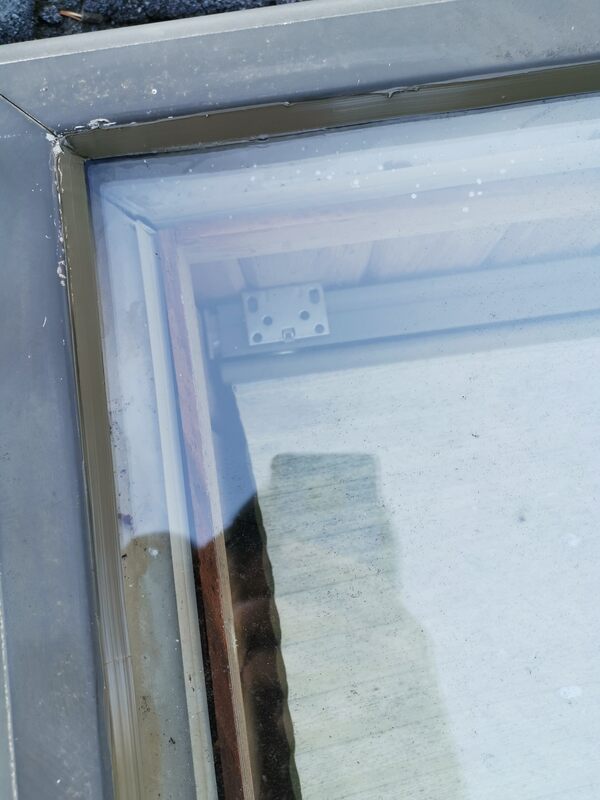
Sealant that is visibly cracked, split, or pulling away from the metal flashing or glass frame on any side of the skylight perimeter is no longer weathertight at that location.
A bead that is flat or convex rather than smoothly concave across its face was applied without correct depth control and will pool water at the joint face rather than shedding it.
Any interior staining, bubbling paint, or soft drywall at the ceiling surrounding the skylight opening confirms active water infiltration that has already reached the interior finish.
Metal flashings that show rust staining, peeling, or delamination adjacent to the sealant line indicate that moisture has been contacting the flashing substrate from behind the existing seal.
Any skylight installation that is more than seven to ten years old and has never had its perimeter sealant professionally assessed or replaced has almost certainly exceeded the service life of its original sealant compound regardless of visible condition.
Defend Your Interior Overhead Lines Before the Next Storm Cycle
A compromised skylight perimeter weatherbarrier stands as one of the single highest-risk structural failures across an entire residential building envelope. Every rainfall that impacts your roof deck channels running water directly against the unshielded breach point.
Furthermore, winter ice dam formations trap standing moisture right along the flashing track, forcing water through the gap under intense hydrostatic pressure. Every season of unshielded solar fatigue rapidly advances the breakdown of any retail caulk that hasn’t been extracted and updated with a commercial-grade polymer.
The subsequent ceiling drywall replacement, sodden attic insulation extraction, and structural rafter timber remediation caused by a multi-season skylight leak are incredibly expensive and disruptive. Fortunately, these compounding internal property losses are entirely preventable through proactive maintenance.
Arrange a Specialized On-Site Skylight Perimeter Assessment
Contact Oleg at Proper Caulking to schedule a specialized, on-site exterior skylight joint structural analysis for your Oakville, Burlington, or Milton property today. Our experienced technical field crew meticulously checks every linear foot of your roof frame perimeters, verifying the structural integrity of your metal flashing tracks and counter-flashing seams.
Our technical field division delivers a precise, line-item summary detailing where your overhead barriers are breaking down and which framing pockets are exposed to water tracking. We completely eliminate future risk by securing our specialized utility weatherproofing applications with a comprehensive 10-year trade warranty on all labor.
Deploying this custom perimeter shield early in the spring weather window is the most reliable way to insulate your exterior utility connections before peak storm cycles hit the Halton region.
Protect Your Ceilings and Roof Framing From Overhead Skylight Leaks
Don’t let blistering roofline solar heat shatter your glass frame seals, ruin your ceiling drywall, or rot out structural timber rafters. Contact us for a specialized, professional skylight joint assessment today.
Proper Caulking – Burlington & Oakville, Ontario