
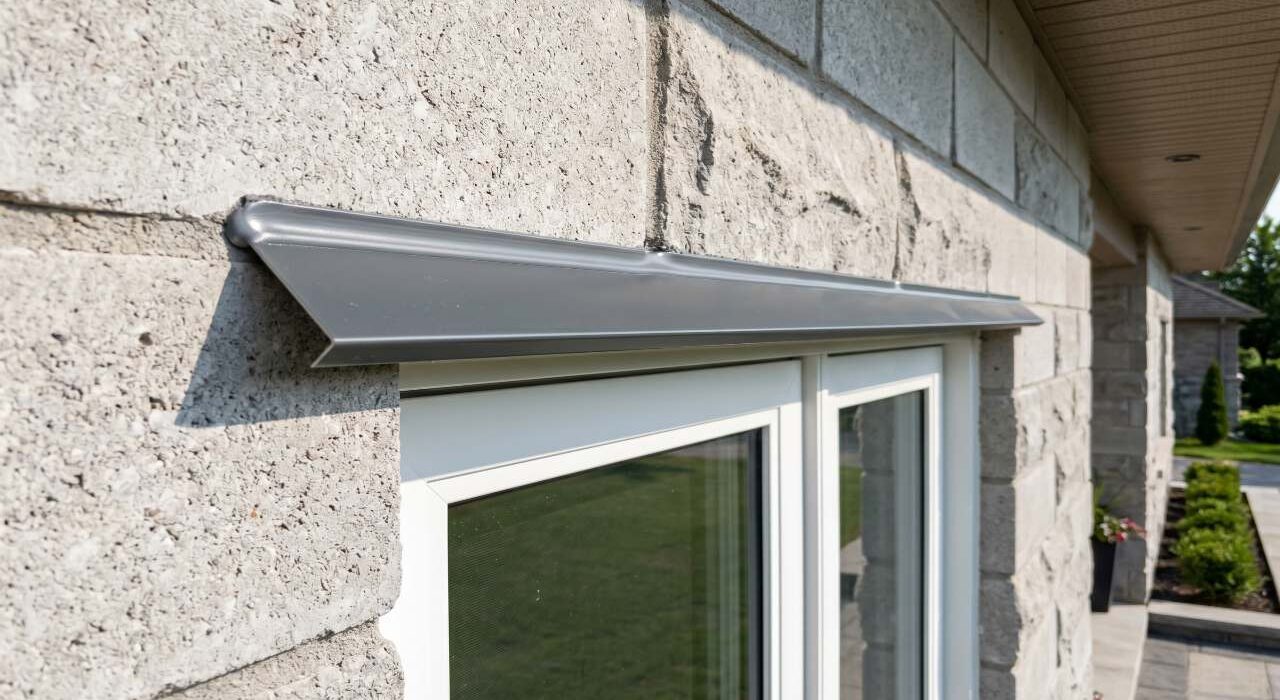
Exterior window flashing caulking addresses the horizontal joint directly above the window frame, not the vertical sides most homeowners notice first. This upper header line is where the real structural water risk concentrates, and it is the most consistently overlooked seal on any residential facade.
During heavy rain, thousands of gallons of water cascade down an upper-story brick face and arrive at the top edge of every window opening simultaneously. The sealant at that horizontal header joint is the last engineered barrier protecting the structural floor joist header buried inside the wall behind it.
Oleg, owner of Proper Caulking, specialises in securing these complex overhead boundaries across Oakville, Burlington, and Milton. His process prevents water from backing up behind metal drip caps and into the sub-wall framing cavity where damage develops invisibly.
⏱️ Flashing Sealing Standard
Sealing the horizontal header directly above a window frame requires a high-adhesion, low-modulus commercial silicone (like DOWSIL 795) to absorb the violent thermal expansion of the structural steel lintel. To handle intense multi-axis shearing forces, installers must pack compressed closed-cell backer rods to maintain a strict 3:2 width-to-depth joint ratio. Leaving the lower drip cap weep paths completely open while creating a flawless, un-tearable concave watershed line on the upper edge is mandatory to prevent catastrophic sub-wall header wood rot.
The Overhead Vulnerabilities: Metal Drip Caps and Steel Lintel Gaps
Suspended directly above every single exterior window opening in a brick-clad home sits a heavy horizontal structural steel lintel. This load-bearing angle iron carries the immense downward weight of the masonry courses running above the window opening and has absolutely nothing to do with moisture protection.
The thin metal drip cap or specialized Z-flashing installed tight against the front face of that support steel is the primary waterproofing element. Its sole architectural job is to intercept heavy sheets of rainwater running down the upper facade and redirect that cascading runoff outward over your window trim.
These are two entirely separate components performing completely different structural duties at the exact same architectural junction. If you are currently dealing with water actively breaching your upper casings during rainstorms, you can read our master guide on window frame leaking water to diagnose internal path tracking.
When the exterior weatherseal at this upper drip cap joint fails, cascading water slips straight behind the flashing apron and loses its outward drainage pathway. The entering water pools continuously in the hidden sub-wall cavity separating the metal flashing plate from the raw lintel face.
Amateur painting crews and untrained caulking companies frequently make this problem significantly worse by sealing the wrong horizontal edges entirely. Slapping a thick bead of caulk across the visible front face of the drip cap converts that protective flashing tray into a completely sealed water dam.
These improper applications directly violate the code-compliant flashings and moisture-control metrics preserved within the official National Research Council Codes Canada publications index.
Rainwater that leaks in from the upper brick joints accumulates inside this artificial basin, backs up through the mortar joints, and delivers a sustained hydrostatic moisture load straight into your home’s multi-ply wood structural header framing.
The resulting timber decay and mold growth remain entirely invisible from the outside of your property. This hidden rot spreads silently until your main floor load-bearing header loses enough structural strength to warp your framing and interfere with your standard window operation.
Our Specialized 4-Phase Overhead Waterproofing Framework
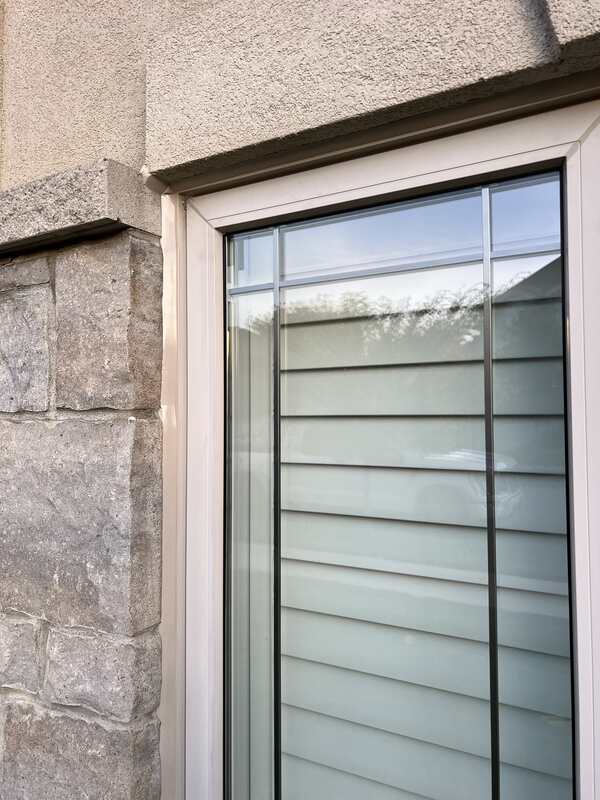
Working overhead at the header zone directly above a window frame requires an entirely different physical approach than standard vertical perimeter sealing. Gravity actively works against material consistency, backing foam placement, and your finished tooling profile in ways that eye-level joint work never encounters.
Phase 1: Excavating the Upper Header Track
Our field crew completely strips out all existing sealant, tar residue, rust scale, and compressed debris packed between the drip cap and the surrounding masonry. Thick rust scale flaking off a corroding steel lintel face must be aggressively abraded using manual wire brushes and mechanical files before any new material is injected.
This aggressive abrasion step is structurally mandatory because a rigid structural steel angle iron possesses a high thermal expansion coefficient that differs drastically from the surrounding clay brick masonry. As direct afternoon solar loading bakes the facade, this thermal mismatch generates violent multi-axis shearing forces directly across the overhead header joint.
Bonding a premium compound directly over loose rust scale is a total waste of your budget because the sealant will simply pull away alongside the detaching metal flakes beneath it. Removing these oxidized layers back to raw, solid steel is the only reliable way to guarantee a permanent adhesive bond.
Phase 2: Verifying the Drip Cap Flange Depth
Before any new material is injected, we carefully examine the drip cap profile to confirm the metal flange geometry allows gravity drainage to function correctly. A thin metal drip cap that has been accidentally bent backward flush with your masonry face by a previous repair requires immediate mechanical correction.
We completely restore this vital drainage track before applying any new seals so that cascading water is actively thrown away from your property envelope. Fixing these metal profiles first prevents old contractor mistakes from being permanently buried behind your new weatherseal.
Phase 3: Compressing the Backing Cushion
Where the open horizontal gap running over your structural steel header is wide or deep, we compress a high-density backing foam strip deep into the joint cavity. This underlying foam cushion sets the precise material depth required to prevent three-sided adhesion failure within the cured compound.
We enforce a strict 3:2 width-to-depth structural ratio across all high-stress multi-material joints to handle conflicting expansion rates cleanly. For a standard 15mm horizontal lintel gap, our technical crews seat closed-cell backing ropes to allow an exact 10mm tool center depth.
Establishing this flexible two-point configuration is absolutely critical because south-facing and west-facing steel lintels generate massive thermal movement under direct afternoon solar loading. Our comprehensive backer rod window sealing guide breaks down the exact physics explaining why maintaining this specific cross-section geometry is mandatory to handle intense material expansion.
Phase 4: Tooling the Code-Compliant Drainage Seal
Our installers inject a specified, heavy-bodied commercial polymer across the entire prepared header track using professional high-pressure applicators. This intensive installation guarantees completely uniform material volume and complete molecular contact across both the metal flashing face and the masonry course above.
To prevent joint failure above the drip cap, our technical field teams tool-finish a consistent bead of elite, neutral-cure architectural silicones like DOWSIL 795 Building Sealant or Sikasil-WS 295. These high-performance compounds bond aggressively to smooth sheet metals, zinc flashings, and rough clay bricks simultaneously, handling extreme lintel expansion without losing edge adhesion.
The finished bead is instantly hand-tooled into a smooth concave profile using a dedicated architectural trowel to ensure a flawless finish. This sharp angle directs cascading stormwater outward over the metal drip edge while leaving your lower flashing weep paths open so gravity drainage functions exactly as the system was engineered.
Prevent Costly Structural Header Rot and Ceiling Remediation
A compromised drip cap seal rarely produces a visible water stain inside your home immediately. Instead, it continuously saturates your multi-ply structural header framing over multiple heavy rain seasons before the hidden moisture finally transfers onto your finished interior drywall layers.
By the time a brown stain actually breaks through the plaster below a window, or the window frame starts operating stiffly, the damage is already severe. The load-bearing header above the window has likely been absorbing water long enough to require a professional structural assessment and expensive timber replacement.
Secure Your Upper Building Envelope Boundaries Today
Coordinate an on-site structural visual assessment with Oleg at Proper Caulking before the next storm cycle reaches your Oakville, Burlington, or Milton property. Our specialized field technicians methodically check every horizontal head flashing, steel lintel iron, and masonry header across your entire home facade.
Every premium drip cap and flashing seal we execute is fully backed by our signature 10-year workmanship warranty against material peeling or adhesive separation. Protect your load-bearing wall framing paths and lower your winter energy bills by dropping a line to our local dispatch team to arrange your home evaluation today.
Frequently Asked Questions: Window Flashing and Lintel Seals
Why is water leaking or dripping from the top of my interior window trim?
Water dripping from the top of an interior window casing usually indicates a complete failure of the horizontal metal head flashing or steel lintel seal directly above the window outside. Cascading rainwater sheeting down the upper brick facade creeps behind the unsealed metal plate and bypasses the frame entirely, traveling downward along internal framing studs until it pools and breaks through your indoor drywall or trim header.
What is the horizontal metal plate sitting directly above my window frame called?
That horizontal metal element is called a drip cap or head flashing, and it is installed to protect your window openings from moisture penetration. Its sole building science purpose is to intercept water sheeting down the exterior wall cladding and throw it outward away from the building envelope, preventing gravity-fed runoff from tracking backward into your structural floor framing.
Why does the caulking line directly above a brick-to-window transition split open so frequently?
This specific horizontal joint splits rapidly because it anchors directly to a load-bearing steel lintel iron that expands and contracts violently under direct solar heat loading. Cheap retail latex and standard store-bought caulks lack the extreme structural elasticity required to handle this intense multi-material thermal shearing force, causing the bead to pull away from the masonry face within a single winter.
Is it safe to completely seal the bottom edge of a window metal drip cap?
No, caulking the bottom front edge of a window drip cap completely closed turns that protective flashing plate into an artificial water dam that traps moisture inside your walls. If water enters from cracked masonry joints above, it will pool behind the sealed metal tray, back up into the wall cavity, and cause catastrophic dry rot across your multi-ply load-bearing structural headers.
Stop Overhead Leaks and Hidden Header Rot
Don’t let cracked drip caps or rusty steel lintels trap cascading rain above your window frames. Contact us for a specialized, professional window flashing sealing assessment today.
Proper Caulking – Oakville, Burlington & Milton, Ontario