
Baseboard and trim caulking is the single step that separates an amateur paint job from a high-end finish. A crisp, professional result is impossible if the joints between the wood and the wall are left open, because light catches every gap and paint cannot bridge it.
Sealing the bottom trim gap where baseboard meets hardwood flooring also stops a surprising amount of cold air infiltration at floor level. This is purely a hardwood and tile detail, not a carpet one, and the distinction matters more than most homeowners realize.
Oleg is the Halton expert behind every seamless, spray-finish quality trim job across Oakville, Burlington, and Milton. His prep work is what makes the paint above it look factory-finished rather than touched up.
The Three Critical Trim Zones
Every interior baseboard profile installation features three entirely distinct architectural transition joints running across your room boundaries. Each unique perimeter boundary demands a completely separate mechanical approach and material selection to guarantee a flawless finish that survives seasonal temperature shifts.
📇 Trim Zone Quick Reference Guide
Before you open a single tube, use this trade checklist to match the correct material approach to each perimeter boundary:
-
📐 The Top Wall Joint: Use Paintable Acrylic Latex.
Why: Fills the irregular drywall shadow line and flawlessly accepts your wall paint topcoats. -
🪵 Hardwood & Tile Floors: Use Flexible Elastomeric Copolymer.
Why: Stays flexible enough to block floor-level winter drafts without tearing during seasonal floor expansion. -
🧵 The Carpet Interface: Leave Completely Unsealed.
Why: Wet chemical sealants will permanently ruin carpet fibers; dense under-padding already naturally blocks drafts.
The Top Wall Joint (The Shadow Line)
Residential drywall surfaces are never perfectly flat, and solid wood trim boards are never completely straight. The resulting structural mismatch creates a continuous, irregular black shadow line above your baseboards that even multiple coats of high-build primer can never fill.
If you are trying to understand the difference between cosmetic interior treatments and heavy-duty structural seals, reading our interior kitchen bathroom silicone caulking comparison guide explains why material choice determines long-term bond durability. Sealing this top horizontal joint smoothly before your painting crew arrives fills that dark void permanently, creating a seamless transition.
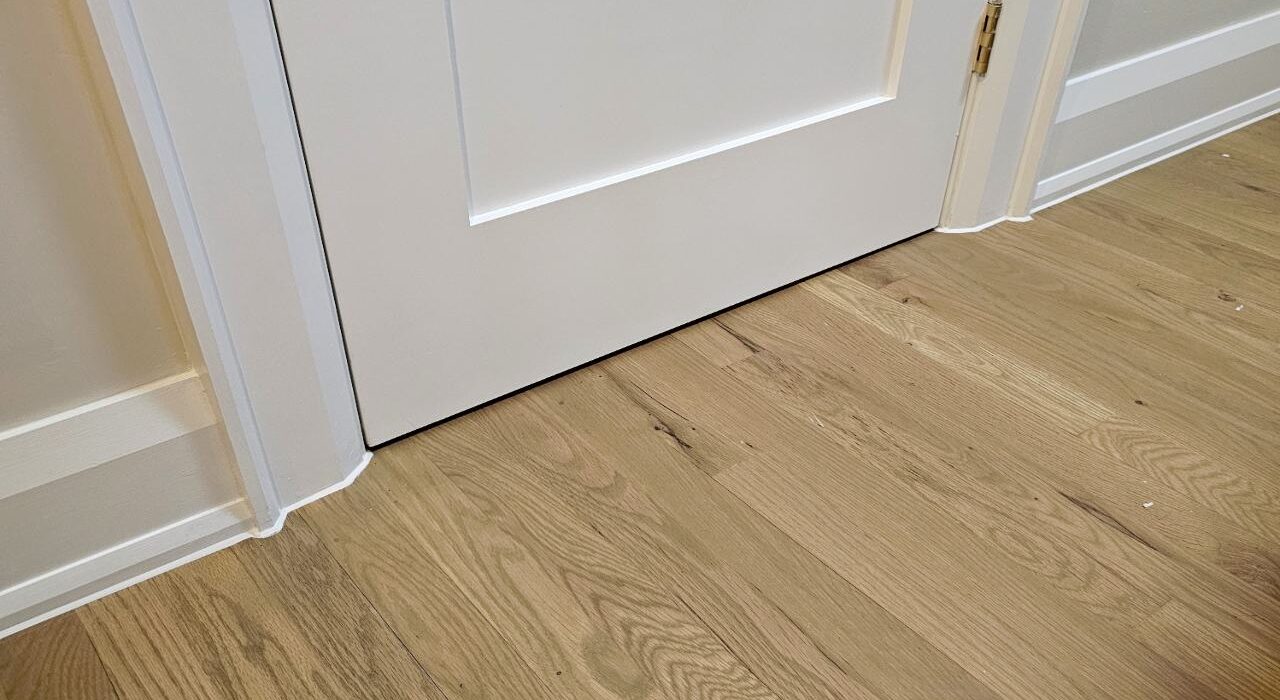
The Hardwood Floor Gap (The Draft Trap)
The bottom edge of a baseboard molding sitting directly against hardwood planks or natural stone tile can absolutely be sealed to stop air movement. This floor-level transition joint should always be addressed on older homes across Oakville and Burlington where noticeable, chilly drafts actively siphon out from behind the plaster walls.
However, this specific boundary demands a highly specialized, elastomeric copolymer compound that accommodates continuous, multi-material shifting. Hardwood floorboards expand and contract drastically across Ontario’s humid summers and dry winters, meaning a rigid box-store latex caulk will completely tear open within a single seasonal cycle.
The Carpet Interface (Why We Never Seal It)
This specific horizontal transition zone is where we must directly correct a very common homeowners’ assumption about trim preparation. Our technical field crews never inject wet caulking or liquid sealants down onto flexible carpet fibers under any circumstances.
Smearing sticky chemical compounds straight into porous carpet strands creates a permanent, hardened mess that destroys the textile pile and can never be reversed. Furthermore, sealing this zone provides absolutely zero functional air-barrier benefit since dense carpet padding already naturally chokes out underlying draft tracking paths on its own.
These decorative wood-to-drywall seal priorities align perfectly with the pristine trim finishing standards managed by the Master Painters Institute manuals directory. This trade-verified approach ensures your paint lines lay perfectly straight without cracking or pulling away from shifting sub-floors.
Our 4-Step Painter’s Prep Caulking Framework
Achieving a perfectly clean interior trim line is a precise trade sequence rather than a single fast step. Skipping even one preparation phase compromises the entire project and leaves noticeable aesthetic flaws across your home boundaries.
True interior finishing excellence relies on a disciplined execution order that prepares the wood substrate completely before a single drop of compound is ever extruded. Rushing through the underlying cleaning phases guarantees that your topcoats will eventually crack, crawl, or peel off the joints.
Phase 1: Vacuuming the Dust Ledge
Our technical field crew completely extracts all micro-debris and fine particulate layers settled along the top trim edge before any caulking gun is loaded. Baseboards naturally collect a fine, sticky dust ledge that remains almost invisible to the eye but acts as a complete bond breaker to a fresh caulk bead.
Injecting premium compounds directly over a contaminated dust layer guarantees immediate adhesion failure and messy peeling within a few weeks. Executing a highly detailed vacuum pass along every single linear foot of wood trim using a soft-bristled brush attachment is a non-negotiable step to expose a raw bonding surface.
Phase 2: The Delicate Tape Mask
We apply premium blue painter’s tape along your hardwood floor boards, positioning the edge hairline close to the absolute bottom of the wood trim. Setting this ultra-narrow margin prevents ugly material smear marks on your expensive finished flooring while still leaving enough joint space exposed to accept the sealant.
Rushing through this protective masking sequence is the number one reason amateur painters leave streaked or ruined hardwood floor finishes. Taking the time to lock in straight, compressed tape boundaries ensures that your final ground-level transition lines look perfectly sharp and uniform across the entire room.
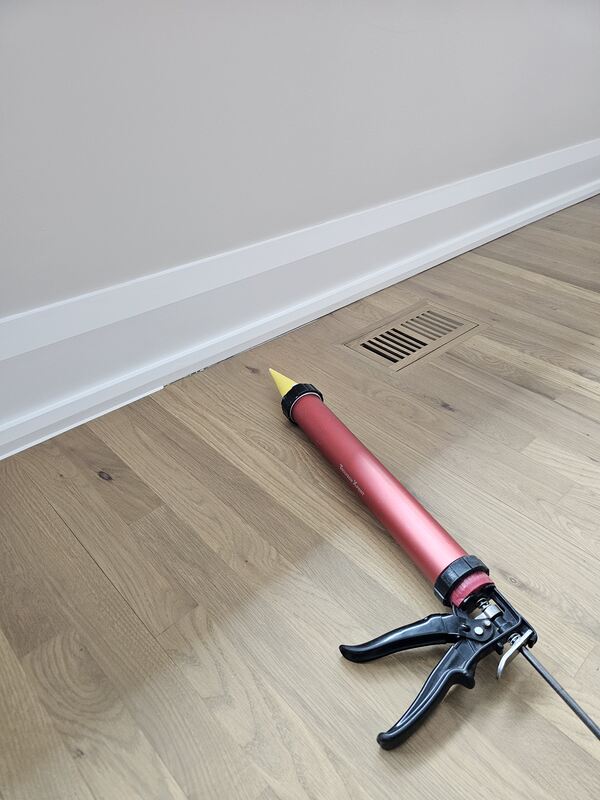
Phase 3: Injecting Paintable Acrylic Latex
Our installers utilize premium paintable acrylic latex compounds across all baseboard and casing joints, completely avoiding standard silicone products. Architectural topcoats, water-based primers, and interior wall paints will never adhere to a raw silicone surface under any circumstances.
Attempting to paint over a silicone bead causes the liquid coating to crawl, bead up, and peel away completely within a matter of days. Specialized acrylic latex formulas are engineered to accept interior latex and oil topcoats cleanly while offering excellent elastic flexibility to handle normal interior framing shifts.
Phase 4: The Wet Finger Tooling Technique
Immediately after the material is injected, we hand-tool the bead using a damp cloth or a wet finger to remove all excess compound before it begins to skin over. This mechanical compression forces the compound deep into the trim-to-drywall void while keeping the final profile sharp, crisp, and thin.
A professionally tooled acrylic bead disappears visually under a fresh coat of paint to leave a smooth, uniform wall transition. Leaving a bead completely untooled creates a thick, bulky rope effect that traps dirt and ruins the high-end look of your custom renovation work.
Stop Floor-Level Drafts and Ugly Paint Lines
An unsealed baseboard joint silently undermines the visual appeal of even the most expensive home renovation project. Regardless of how high your paint color quality is or how precise the trim carpentry cuts are, the human eye will track straight to the dark shadow line gaps splitting your walls apart.
Leaving these open tracks exposed also allows sub-floor drafts to continuously siphon into your main living spaces, spiking your winter heating bills. Securing these perimeters creates a neat, continuous block that protects your framing while locking in your interior climate comfort.
Coordinate Your Interior Paint Prep Evaluation Today
Contact Oleg at Proper Caulking to get your baseboards and interior wood trim properly prepped and sealed before your next paint project launches. Our technical field division services residential and commercial interior spaces across Oakville, Burlington, and Milton to lock in flawless, paint-ready boundaries.
Every single baseboard and trim job we execute is completed to a seamless, spray-quality standard that looks pristine for years, not months. Drop a line to our local dispatch office today or visit our online contact page to secure a comprehensive, zero-obligation on-site visual assessment for your home.
Eliminate Shadow Lines and Floor-Level Drafts
Don’t let dusty baseboard gaps or cracked floor trim joints ruin your premium interior paint lines. Contact us for a specialized, professional baseboard and trim caulking assessment today.
Proper Caulking – Oakville, Burlington & Milton, Ontario
Frequently Asked Questions: Baseboard and Trim Caulking
Should I caulk baseboards before or after painting?
You should always complete this step before your final painting project begins. Executing the caulking sequence first allows the paint topcoat to roll completely over the cured acrylic bead, locking in a flawless, uniform finish with no visible seams.
Can I use bathroom silicone on my bedroom baseboards?
No, you must never utilize standard bathroom silicone products on interior wood trim casings. Silicone is engineered explicitly for wet plumbing fixtures and will completely reject interior paints, causing your topcoats to crawl, bead up, and peel off within a matter of days.
Why is there a draft coming from under my baseboards?
On tile or hardwood floorboards, the open horizontal gap sitting beneath your baseboard trim serves as a direct path for structural air infiltration. This floor level draft tracking happens frequently along exterior framing walls, making it critical to seal the horizontal seam with a highly flexible elastomeric polymer to choke off the cold air permanently.
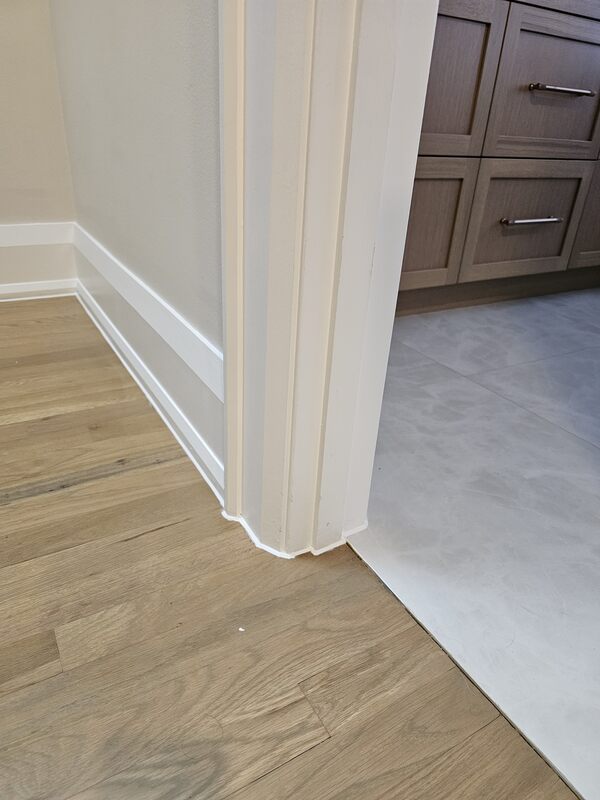
Do you caulk the vertical corners where baseboards meet?
Yes, our technical field division treats every single vertical inside and outside corner joint on a trim run. We apply the exact same compressed paintable acrylic latex compound to these corner junctions, ensuring that every angle across your room boundaries looks continuous and professionally finished.